
7 STEPS TO TURN UP THE HEAT IN YOUR HOME WITH A GAS FIREPLACE
Feeling fireplace FOMO this winter?
If these chilly nights have you dreaming of flickering flames and toasty toes, you’re not alone. The bad news? You might’ve missed the boat for this winter. The good news? Next winter is yours for the taking, and now’s the perfect time to start planning.
Don’t let a missing fireplace become your biggest reno regret. It is possible to retrofit one into your home, and trust us, it can completely change the way your space feels.
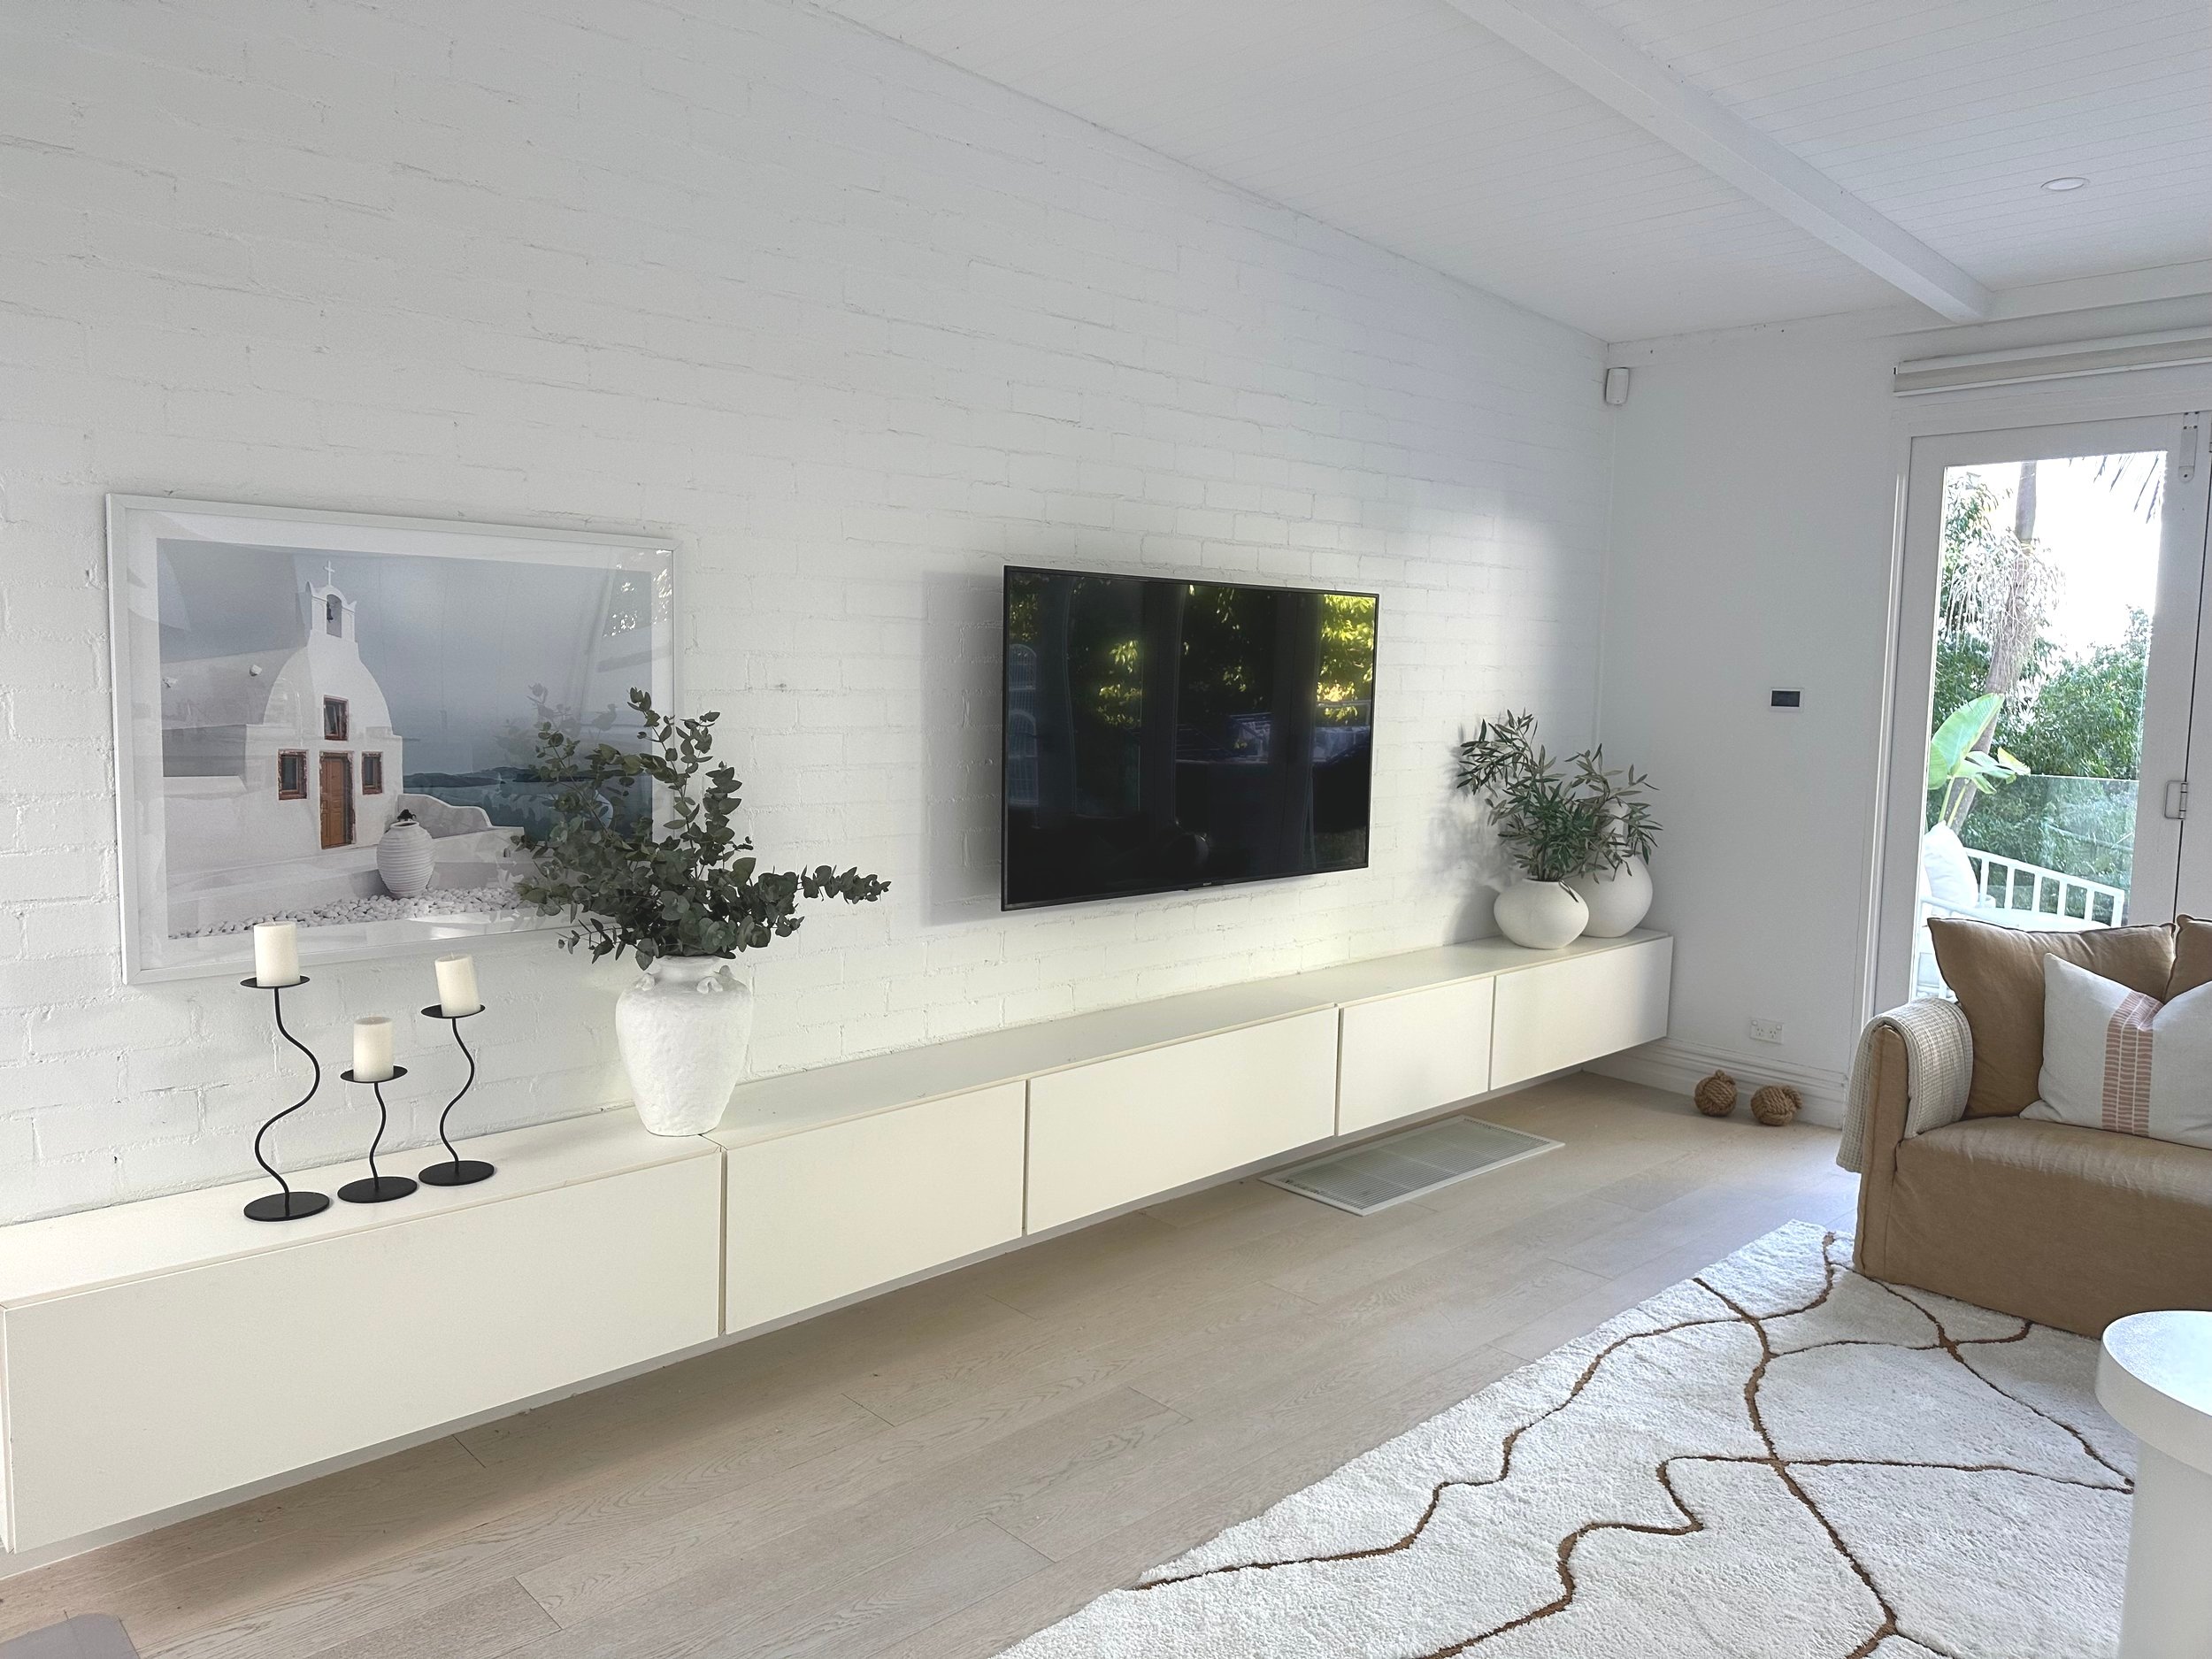
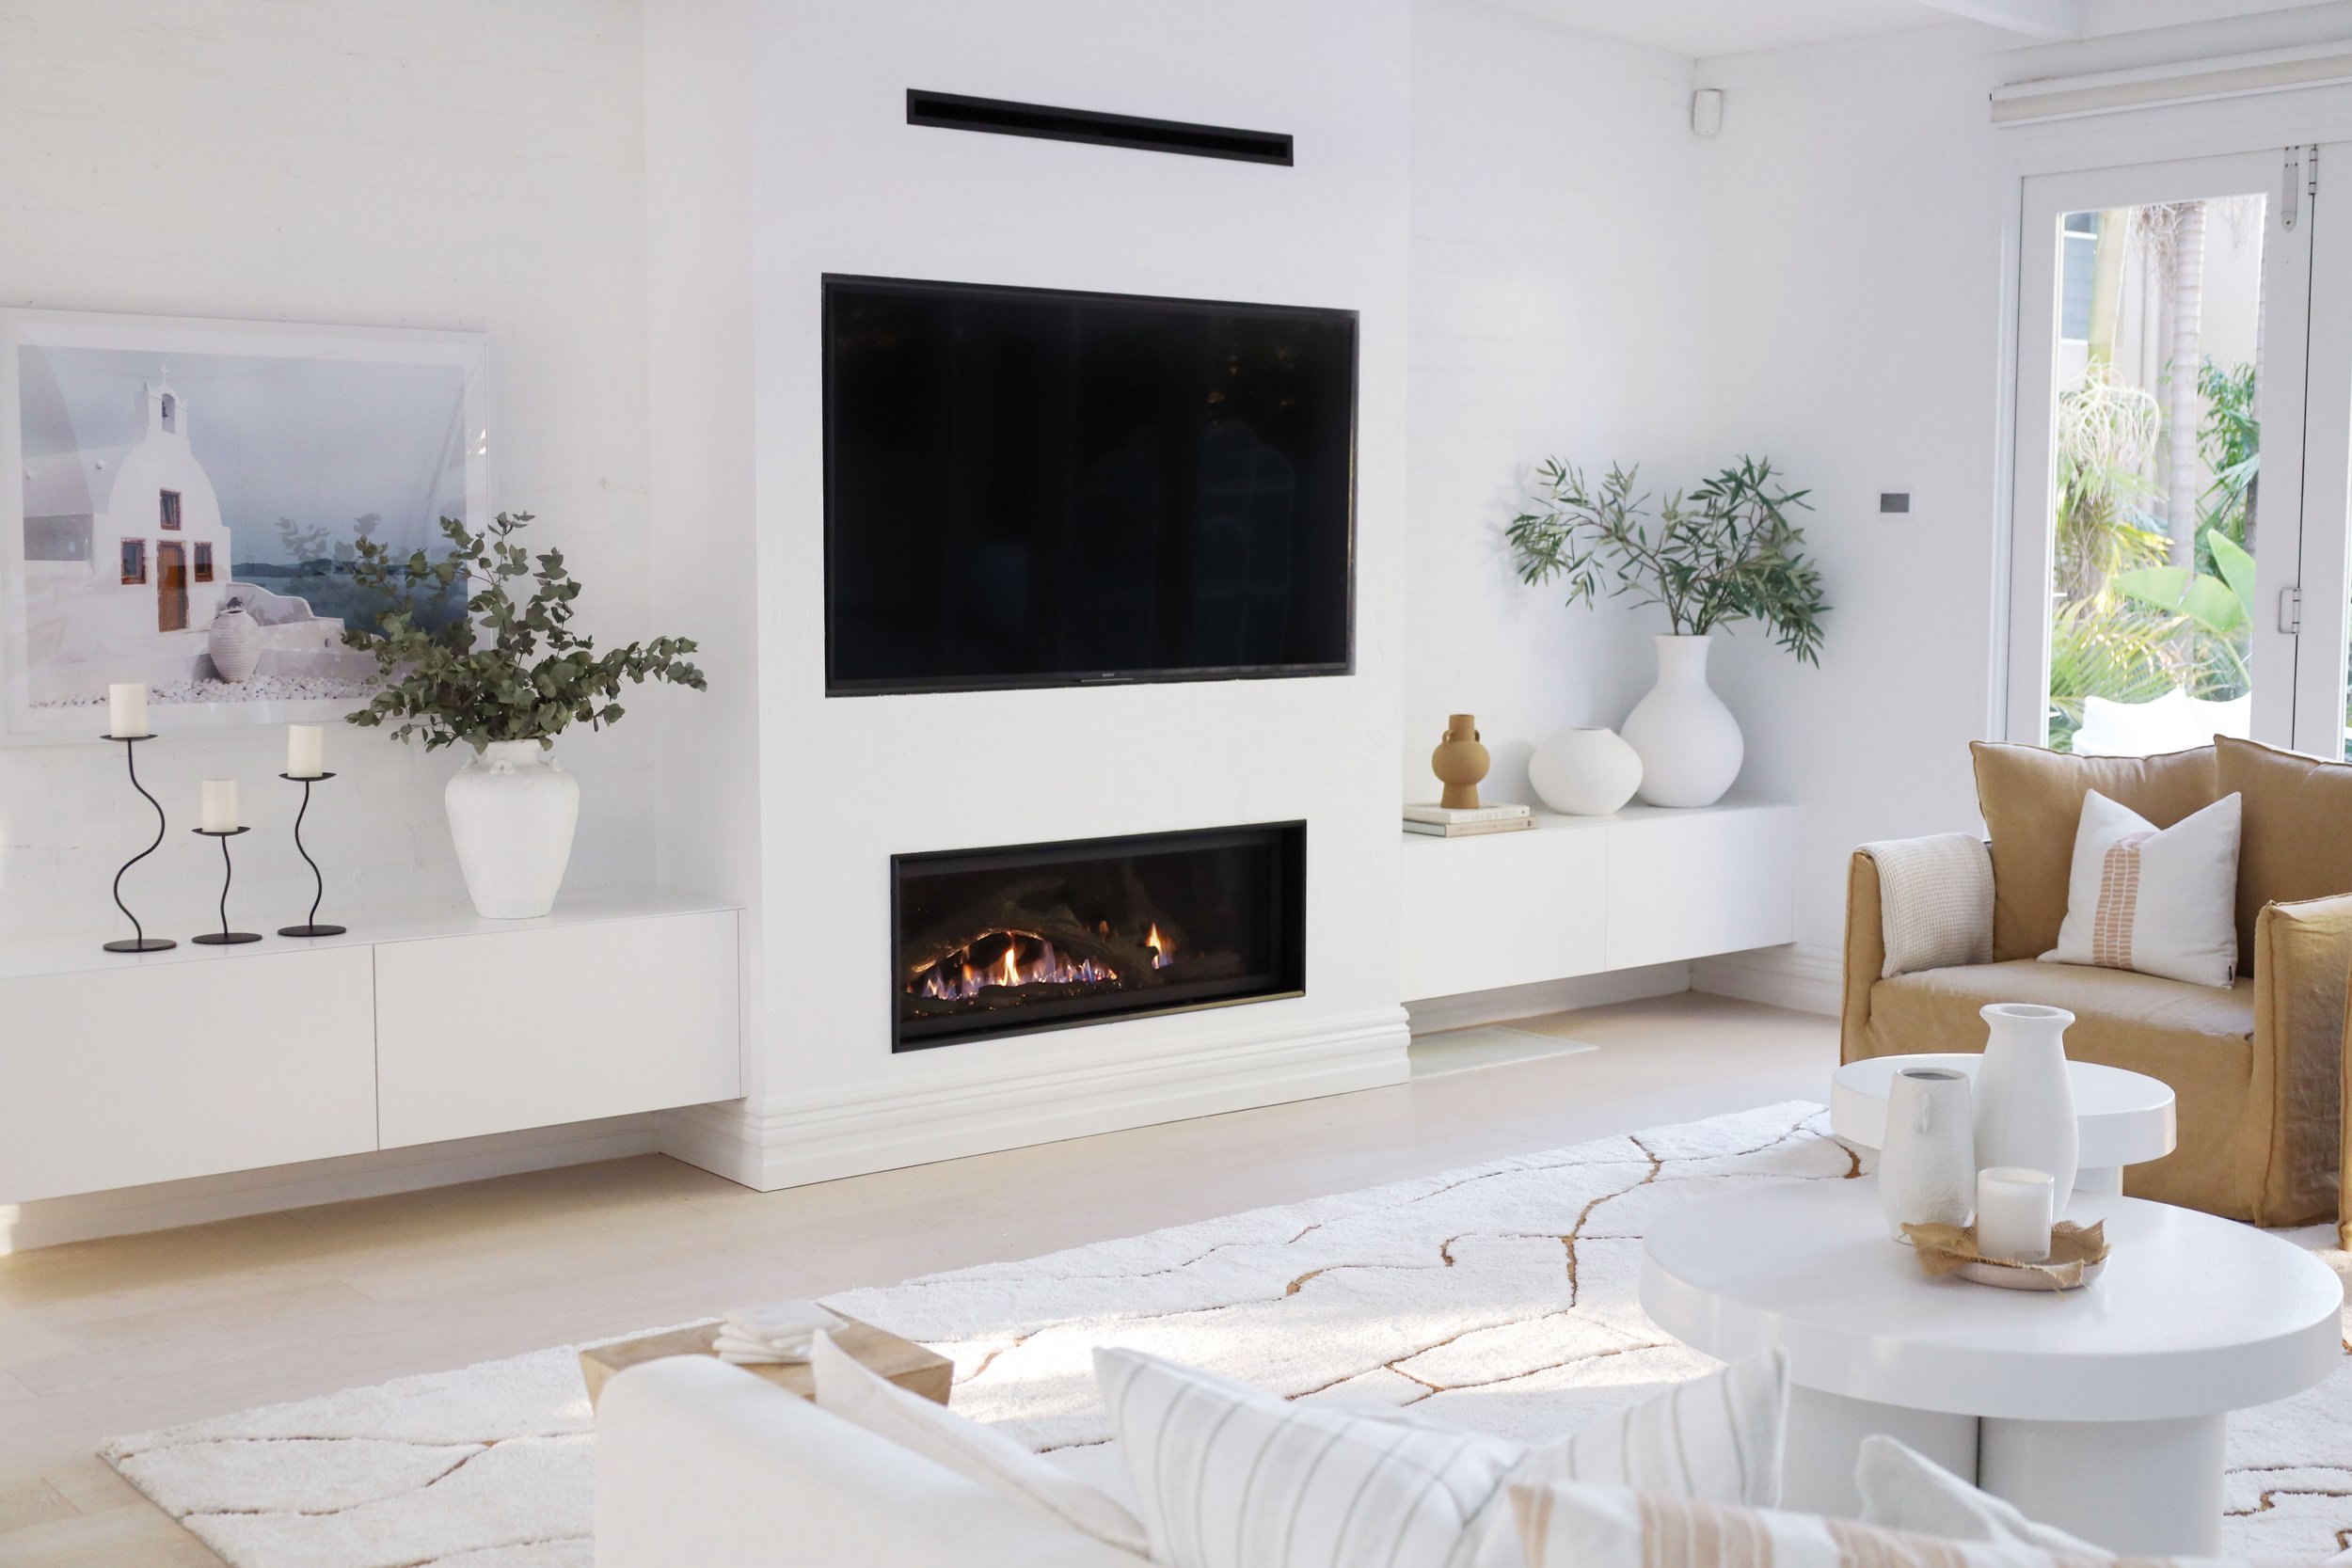
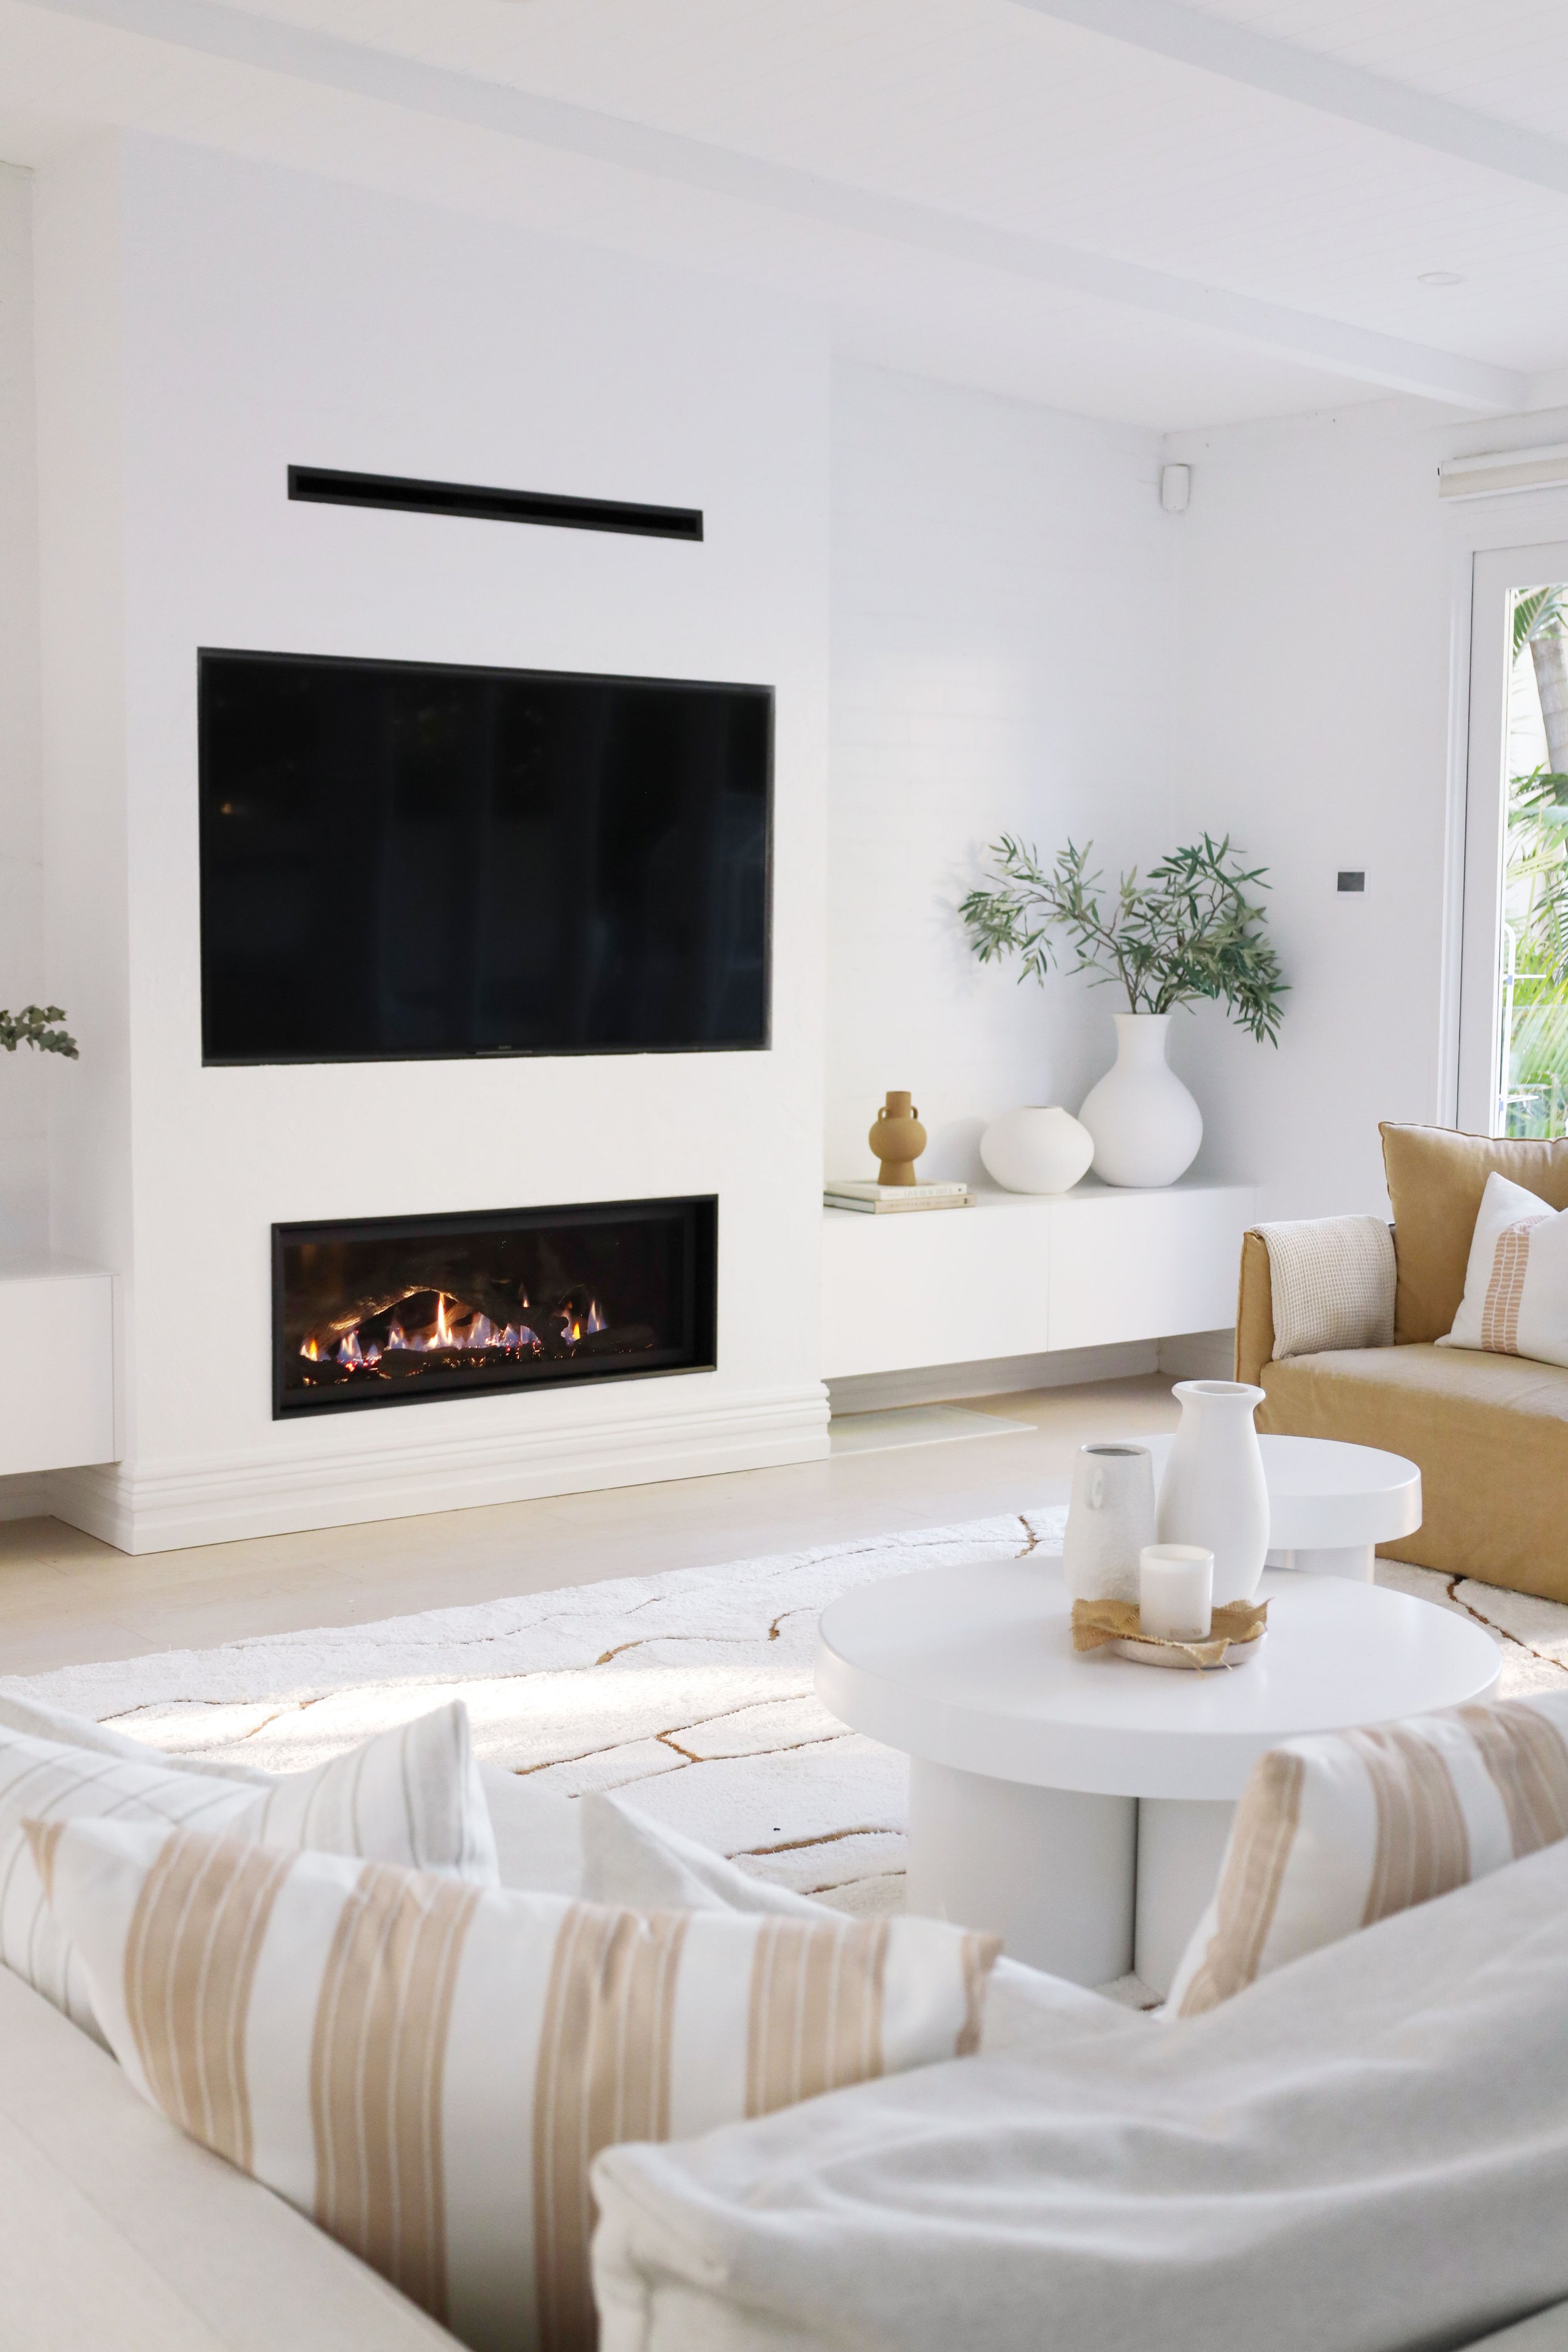
Just take a look at the living room in House 6. A fireplace wasn’t part of the original reno plan, but we added one years later, and it transformed the space. It’s warmer, more inviting, and come winter, the whole family flocks to it like moths to a flame.
If you skipped the fireplace the first time ‘round and you’re now kicking yourself… you’re in good company. But, chances are, it’s not too late to create the cosy vibes you’ve been craving.
Here’s how we retrofitted this gas fireplace, step-by-step.
7 STEPS TO INSTALLING A DREAM FIREPLACE
STEP 1: PICK YOUR PERFECT GAS FIREPLACE
Start by choosing a gas fireplace that suits your home, your style, and the way you like to live. Gas fireplaces offer the warmth and ambience of a real flame, with the convenience of instant heat at the flick of a switch, perfect for creating a cosy, inviting space.
Look for features that suit your space, like wood inserts for a more natural look, or a mirrored back to enhance the flame. And if you're planning to mount a TV above, check whether the fireplace has a heat management system to keep things cool and safe.
🔥 Hot tip: In House 6, Lana chose a gorgeous Lopi gas fireplace with their clever CoolSmart system, which redirects heat away from the TV and out through a discreet vent above, meaning no need for a mantle.
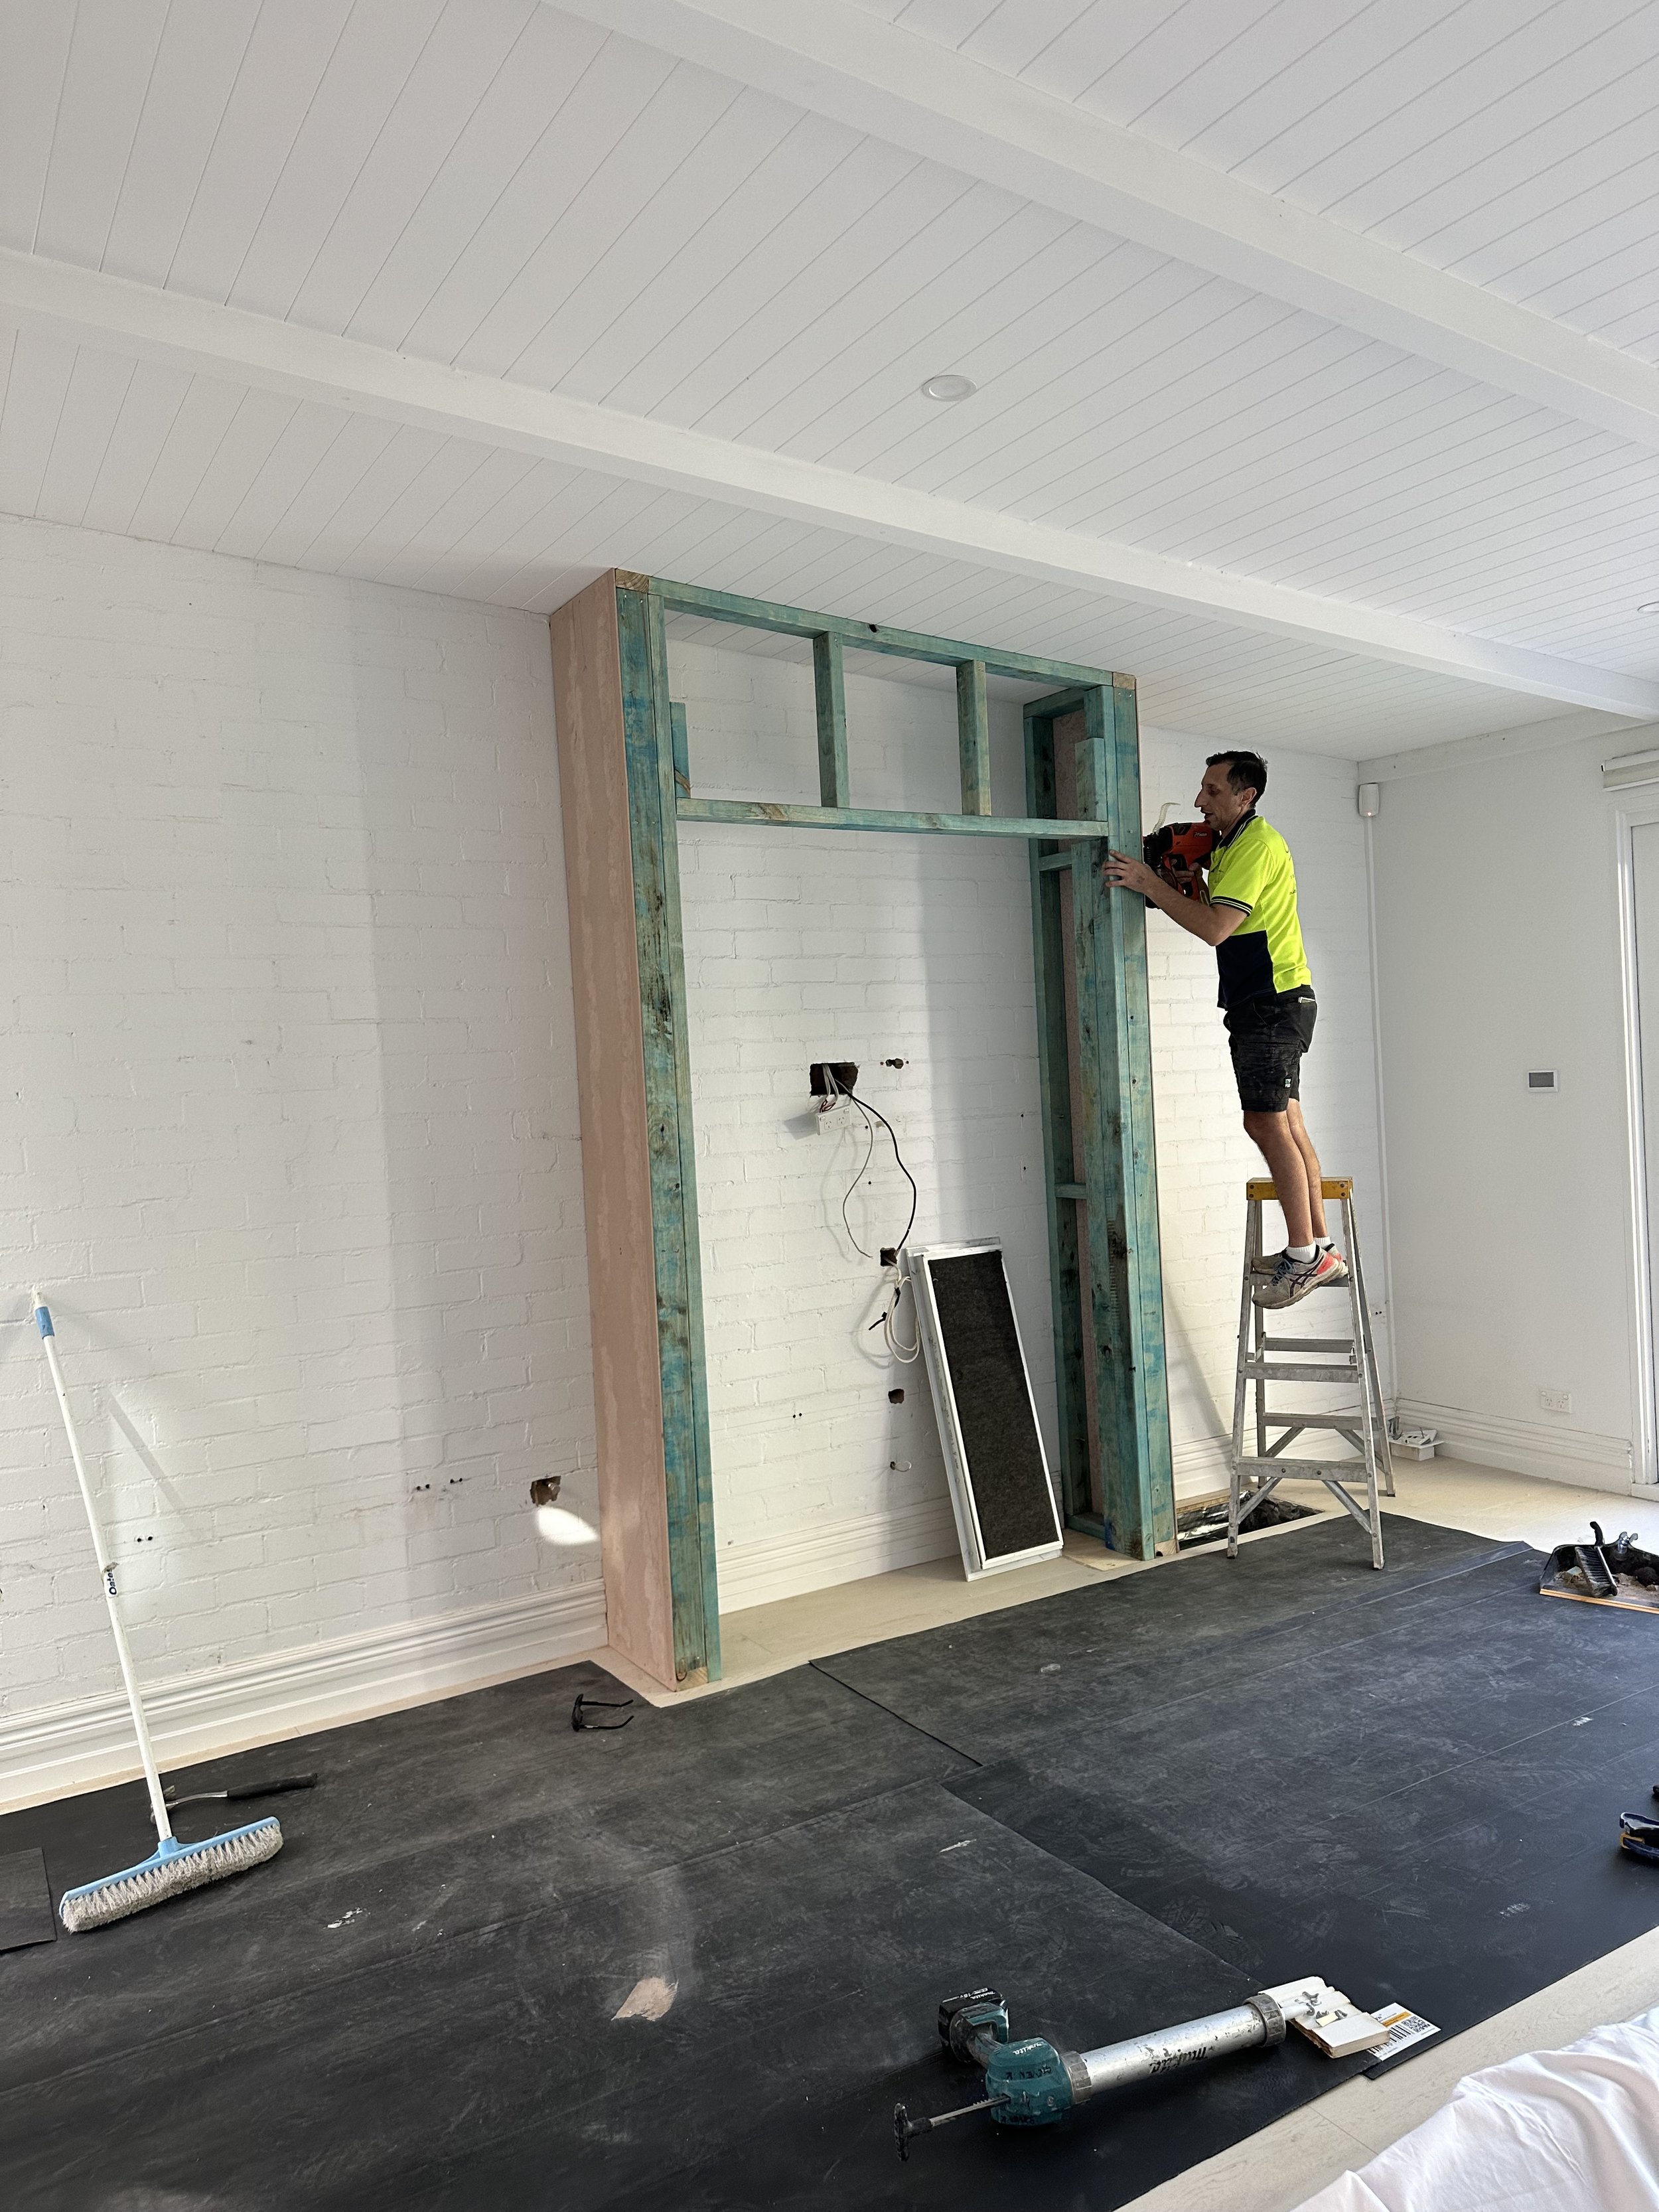
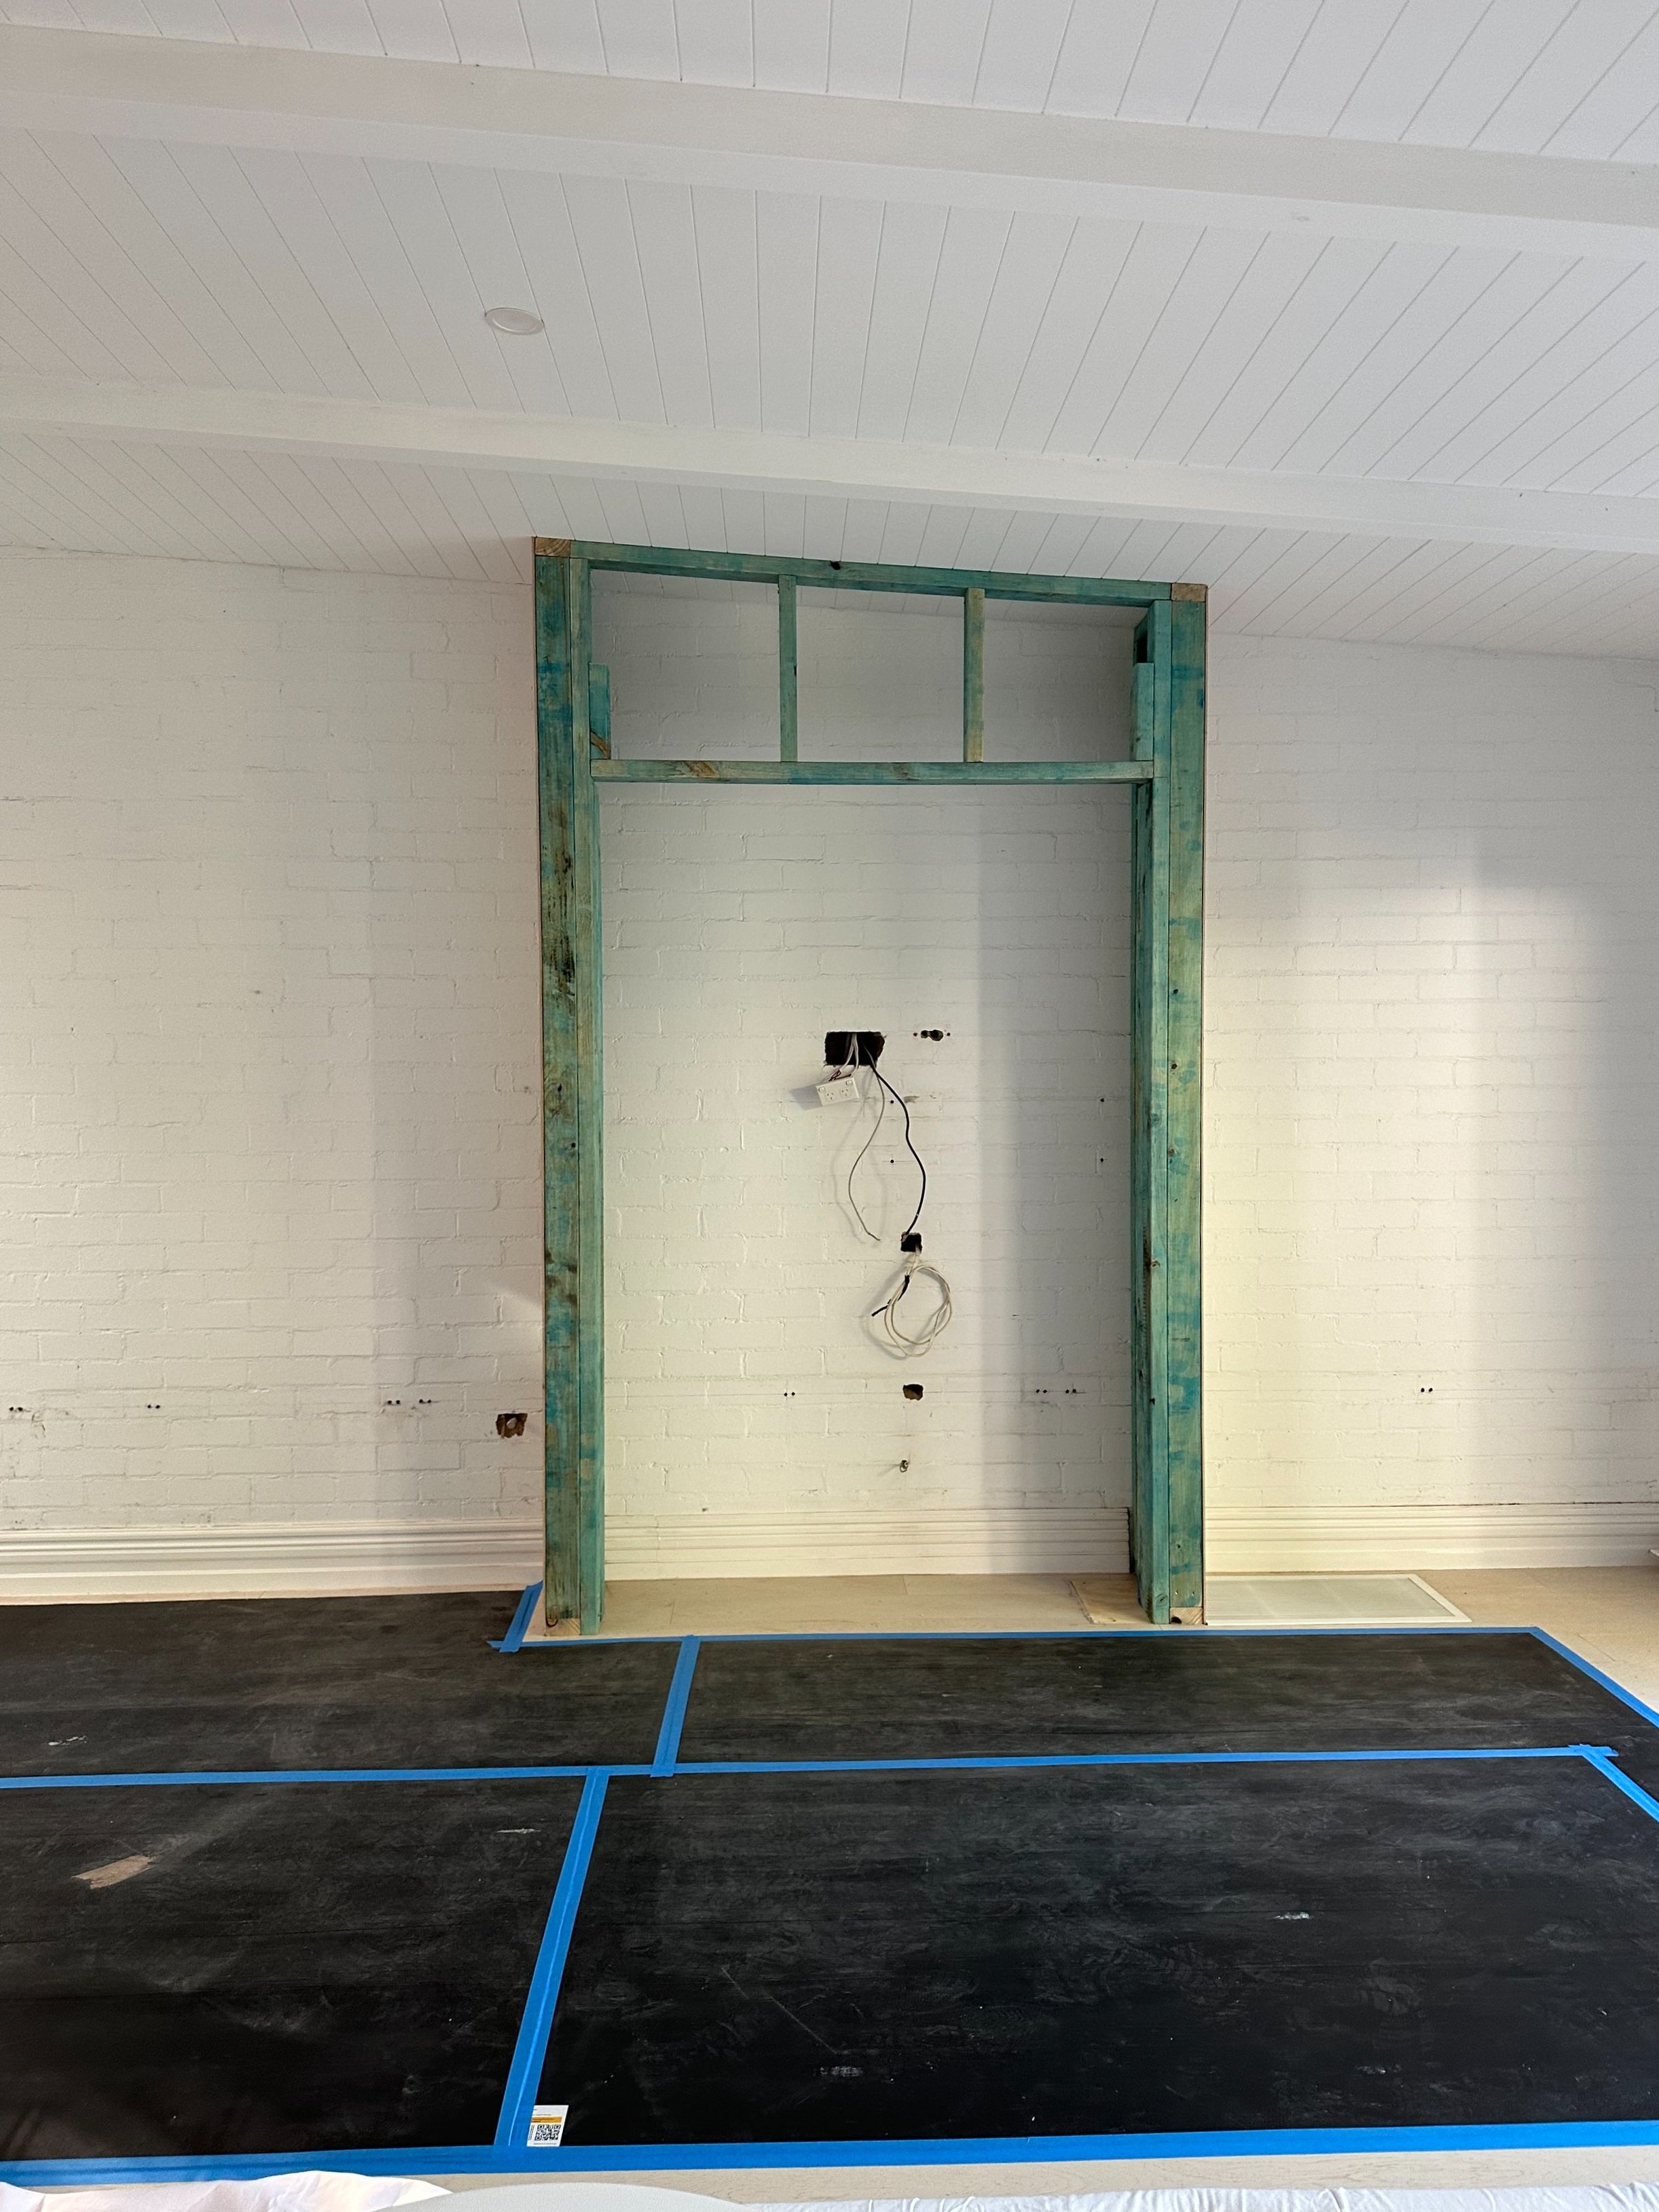
STEP 2: GET IT IN POSITION
Measure out exactly where you want the fireplace to sit, keeping in mind the height and position of the TV if it’s going above. Once you’ve landed on the layout, get your chippie to build the timber framework around it.
💡 Reminder: Don’t forget your services. A gas fireplace needs both a power connection and a gas line, so make sure those are planned in before the build begins.
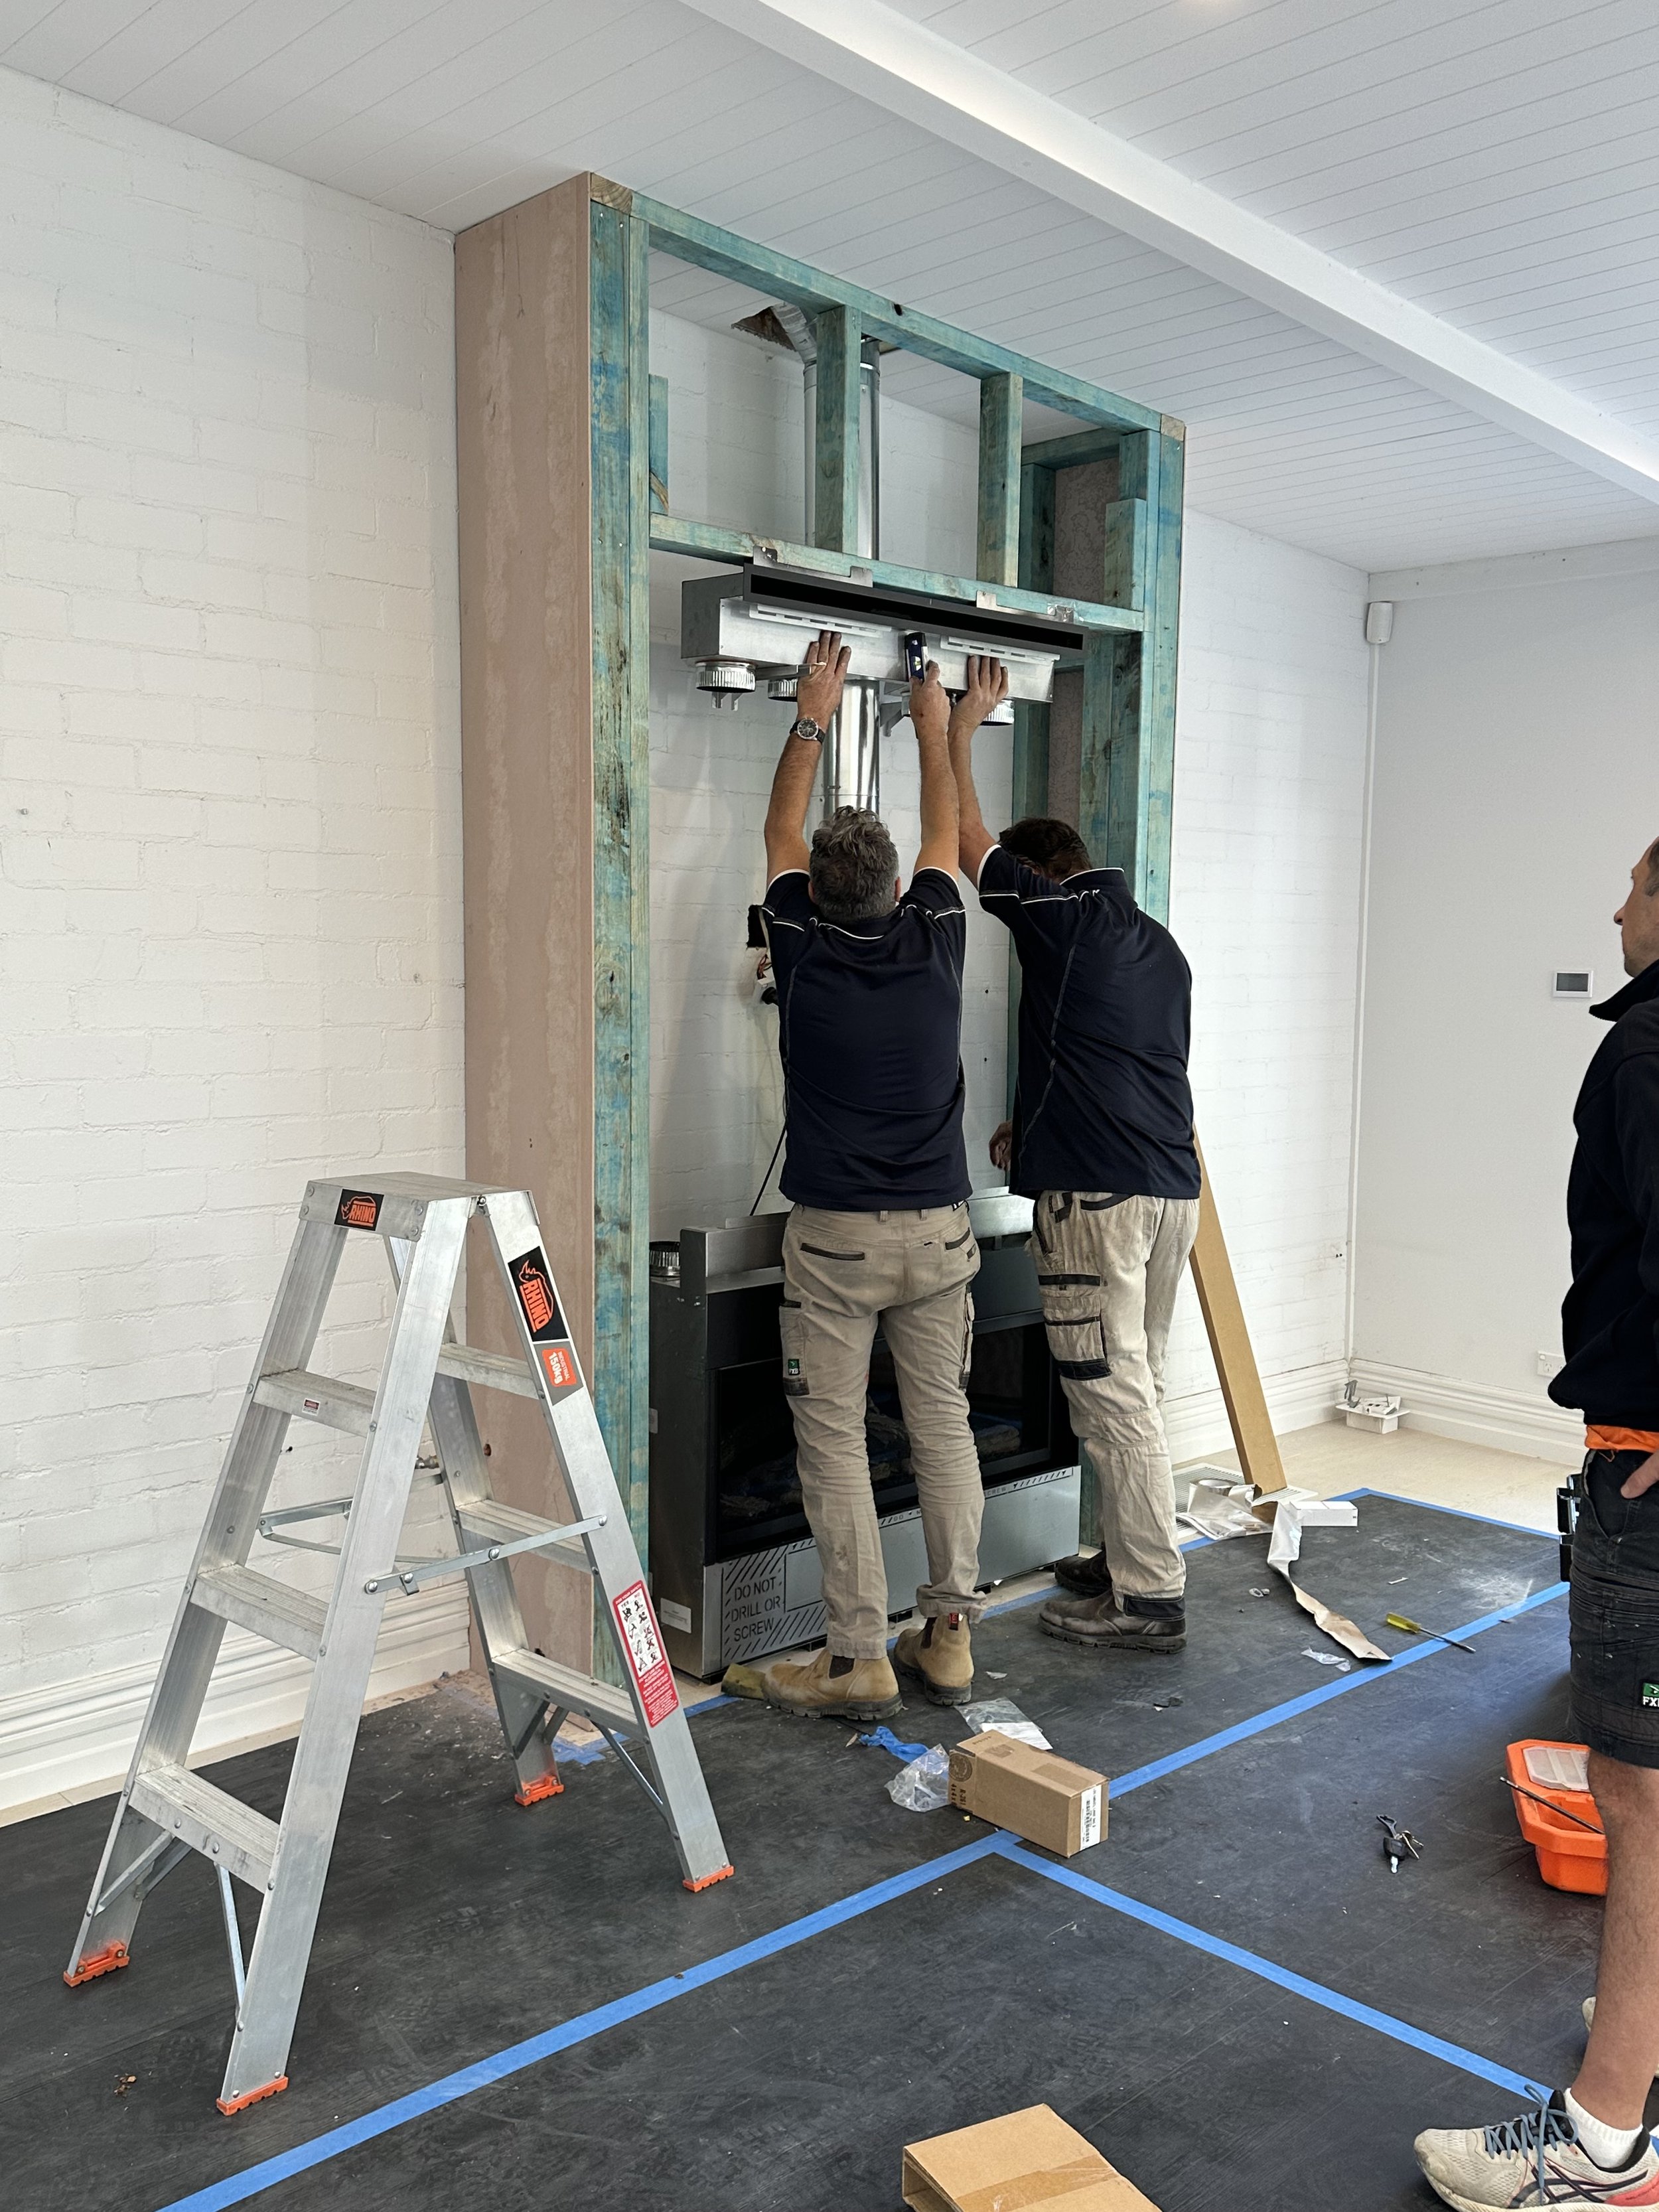
STEP 3: CALL IN THE PROS
Fireplace installation is definitely not a DIY job. You’ll need to call in licensed gasfitters to install the unit, fit the flue through the roof, and connect the gas line. We used Lopi’s recommended installers, who also hooked up the CoolSmart system.
They’ll also test everything thoroughly to make sure it’s running safely and smoothly. Peace of mind is priceless!


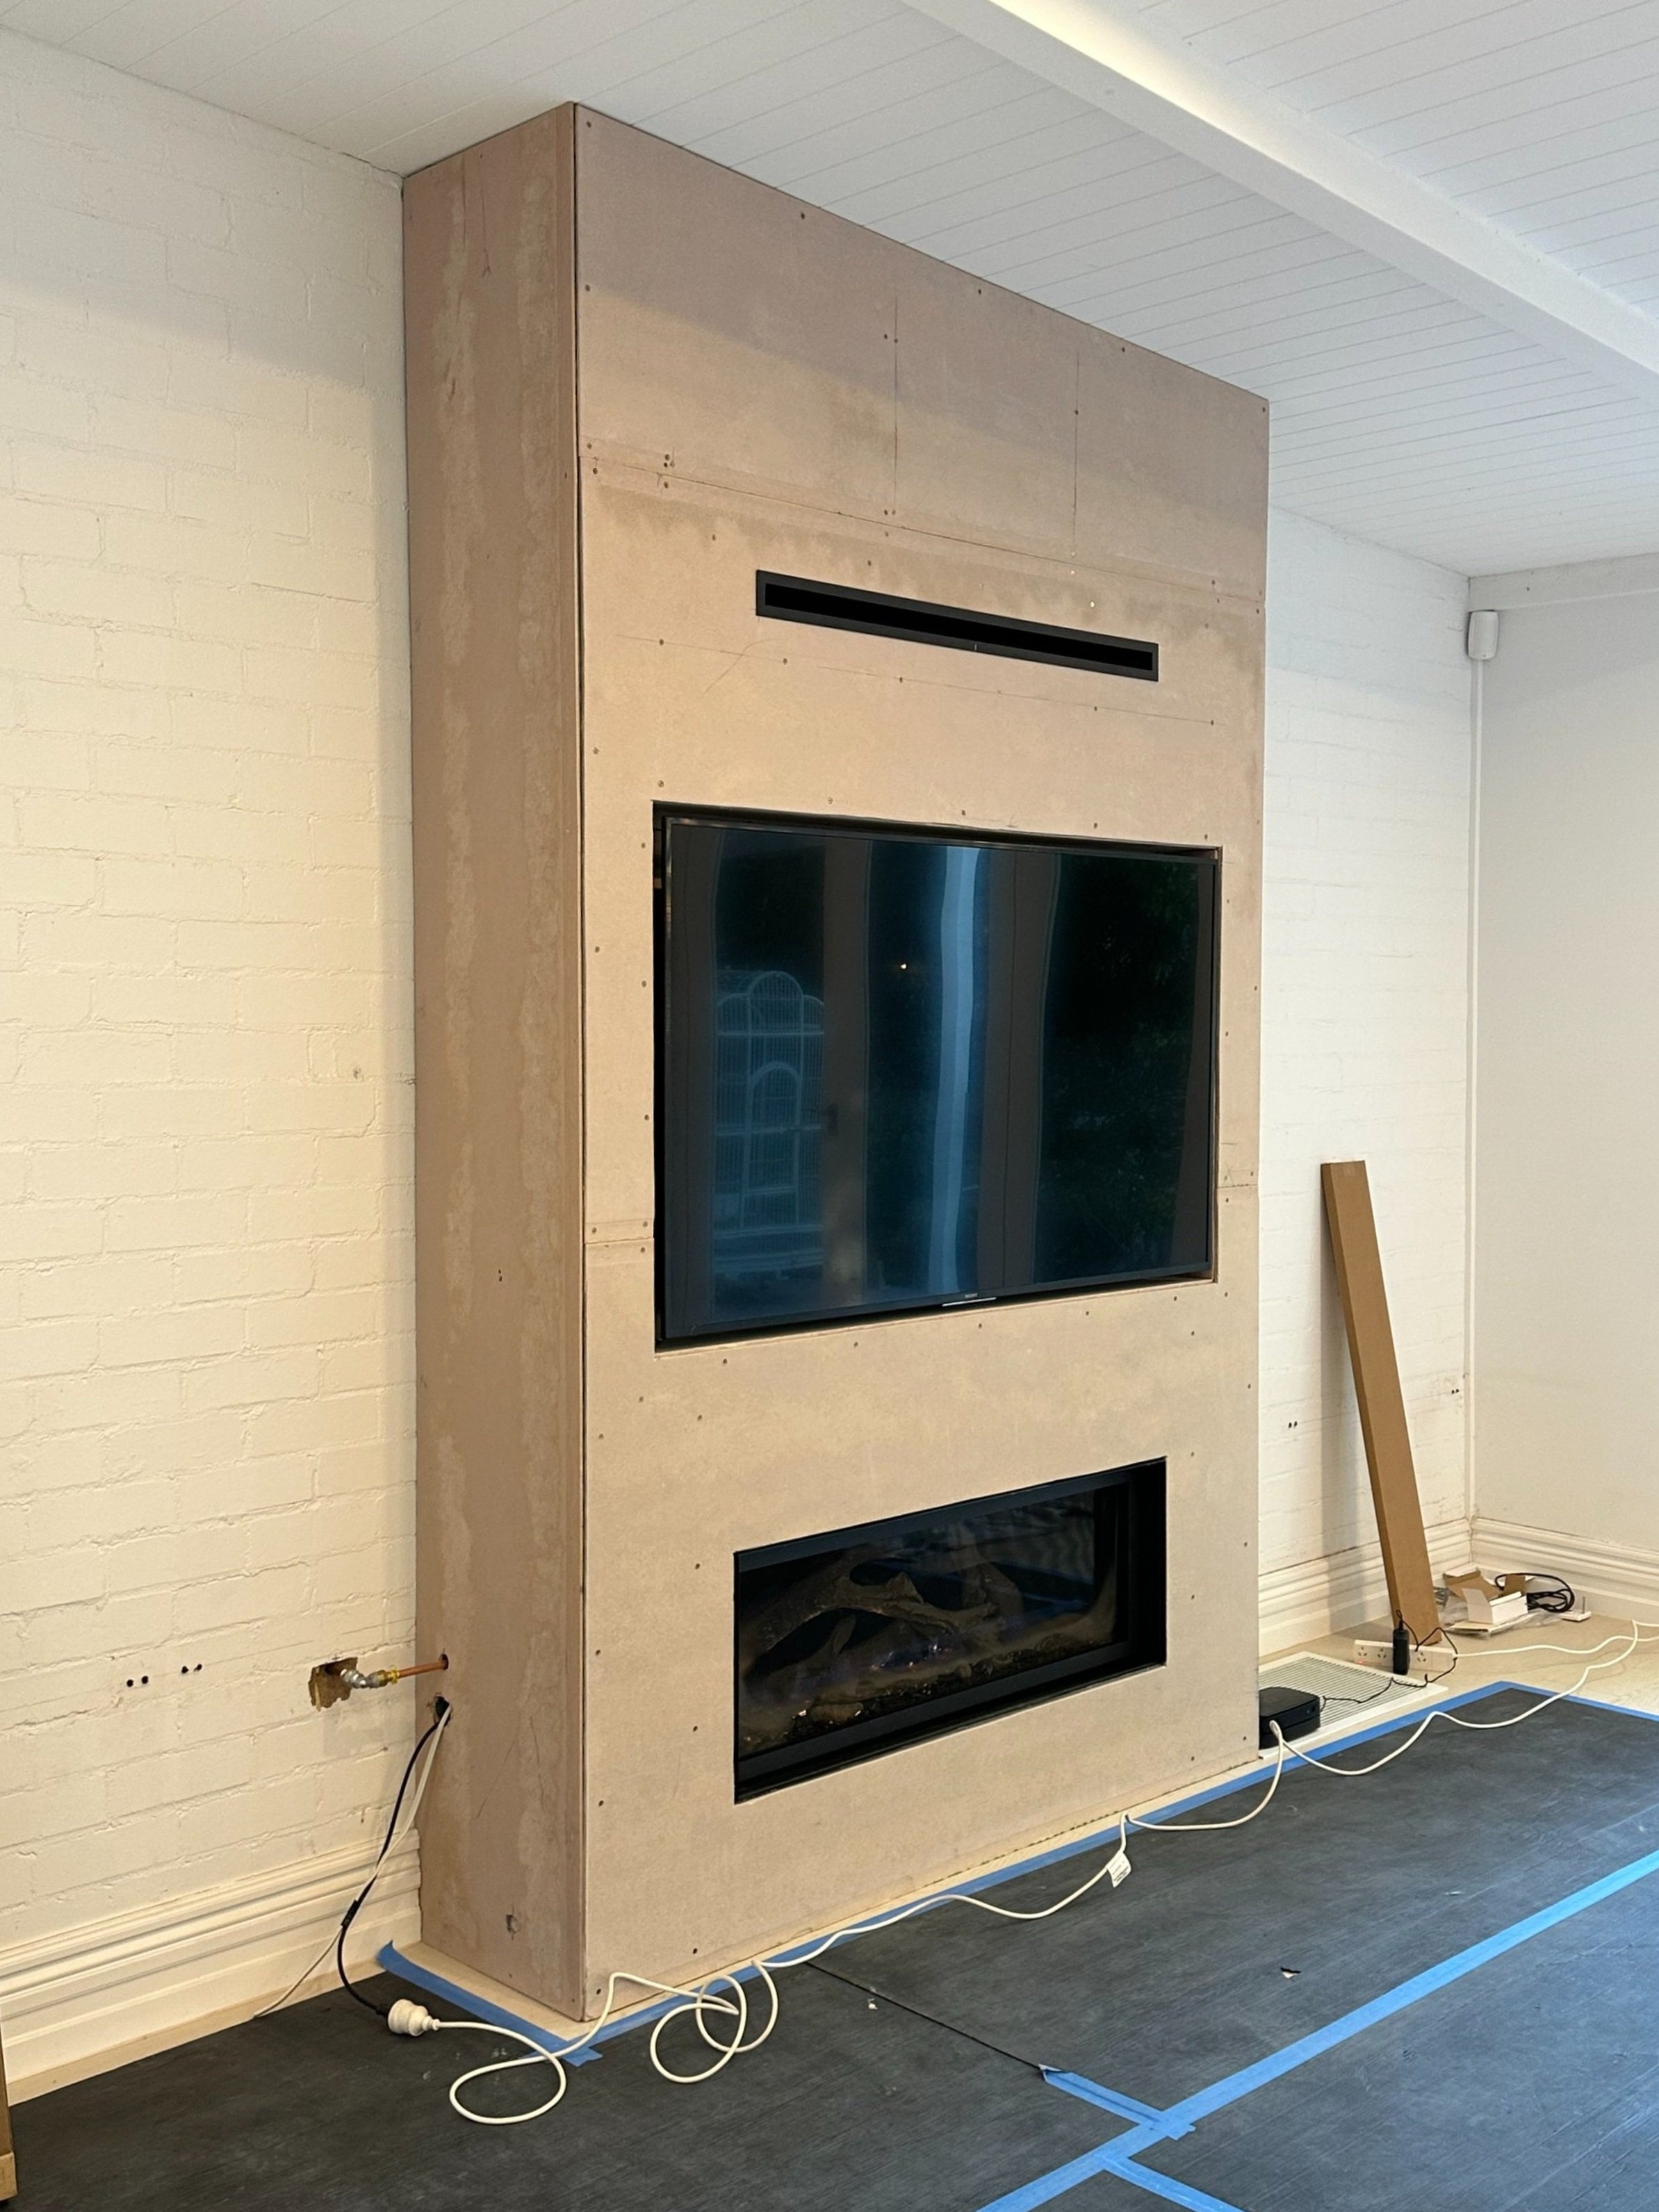
STEP 4: BUILD THE SURROUND
Once the fireplace is in, it’s time to get your chippie back to enclose the frame with Villaboard - a fire-resistant cement sheet that’s perfect for hot zones like this. If you’re hanging your TV above the fireplace and want it recessed, your chippie can also build the nook you’ll need to keep the finish flush and modern.
✨ Tip: Consider futureproofing your design by building a slightly larger recess, just in case you ever want to upgrade your TV down the track.
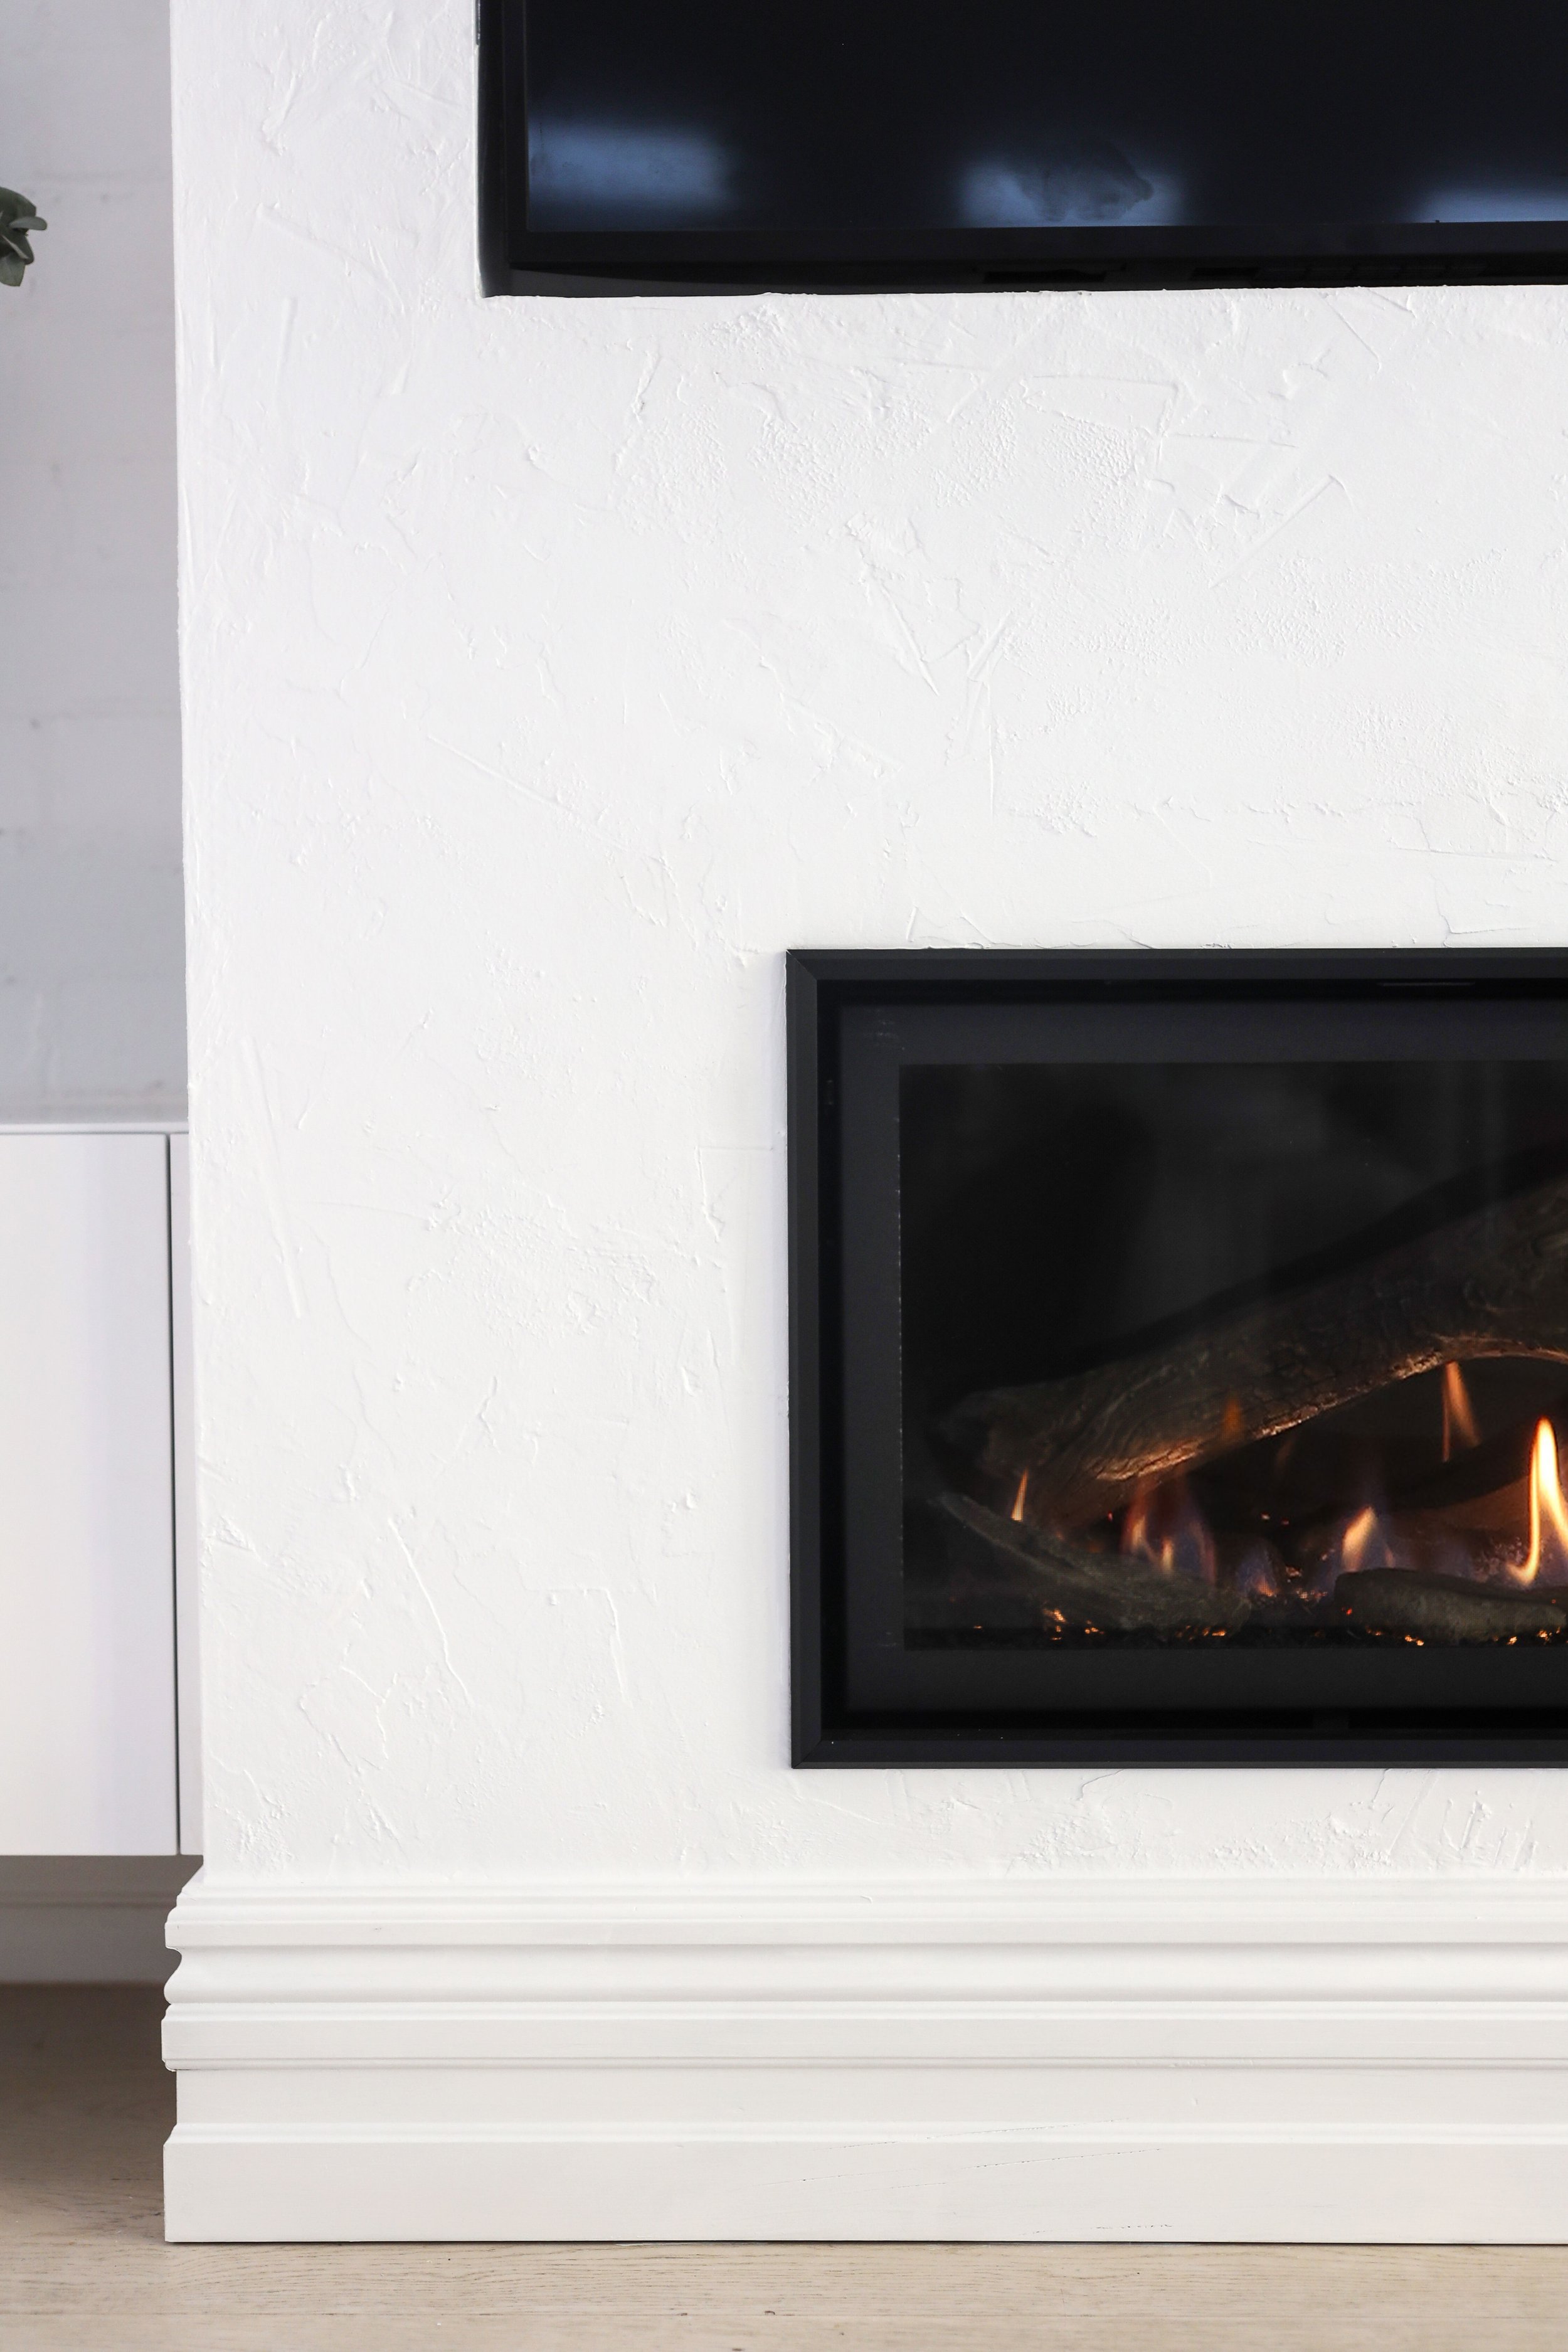
STEP 5: ADD TEXTURE & PAINT
Now it’s time to bring in the plasterer. They’ll set the Villaboard joints using joint compound. In House 6, we added a light texture across the whole wall to echo the rustic finishes throughout this Mediterranean-inspired home.
Once that’s dry, add skirting boards (if you're matching them to the rest of the room), and then it’s time for paint. At House 17, we painted the fireplace surround a different colour to create a feature.
STEP 6: ADD STORAGE & STYLE
If you want to make the most of the wall space, now’s the time to add cabinetry on either side of the fireplace. Extra storage is always a bonus, and the clean lines help keep everything feeling calm and uncluttered. You could have a cabinetmaker do this for you or DIY with flatpack cabinetry if you’re handy.

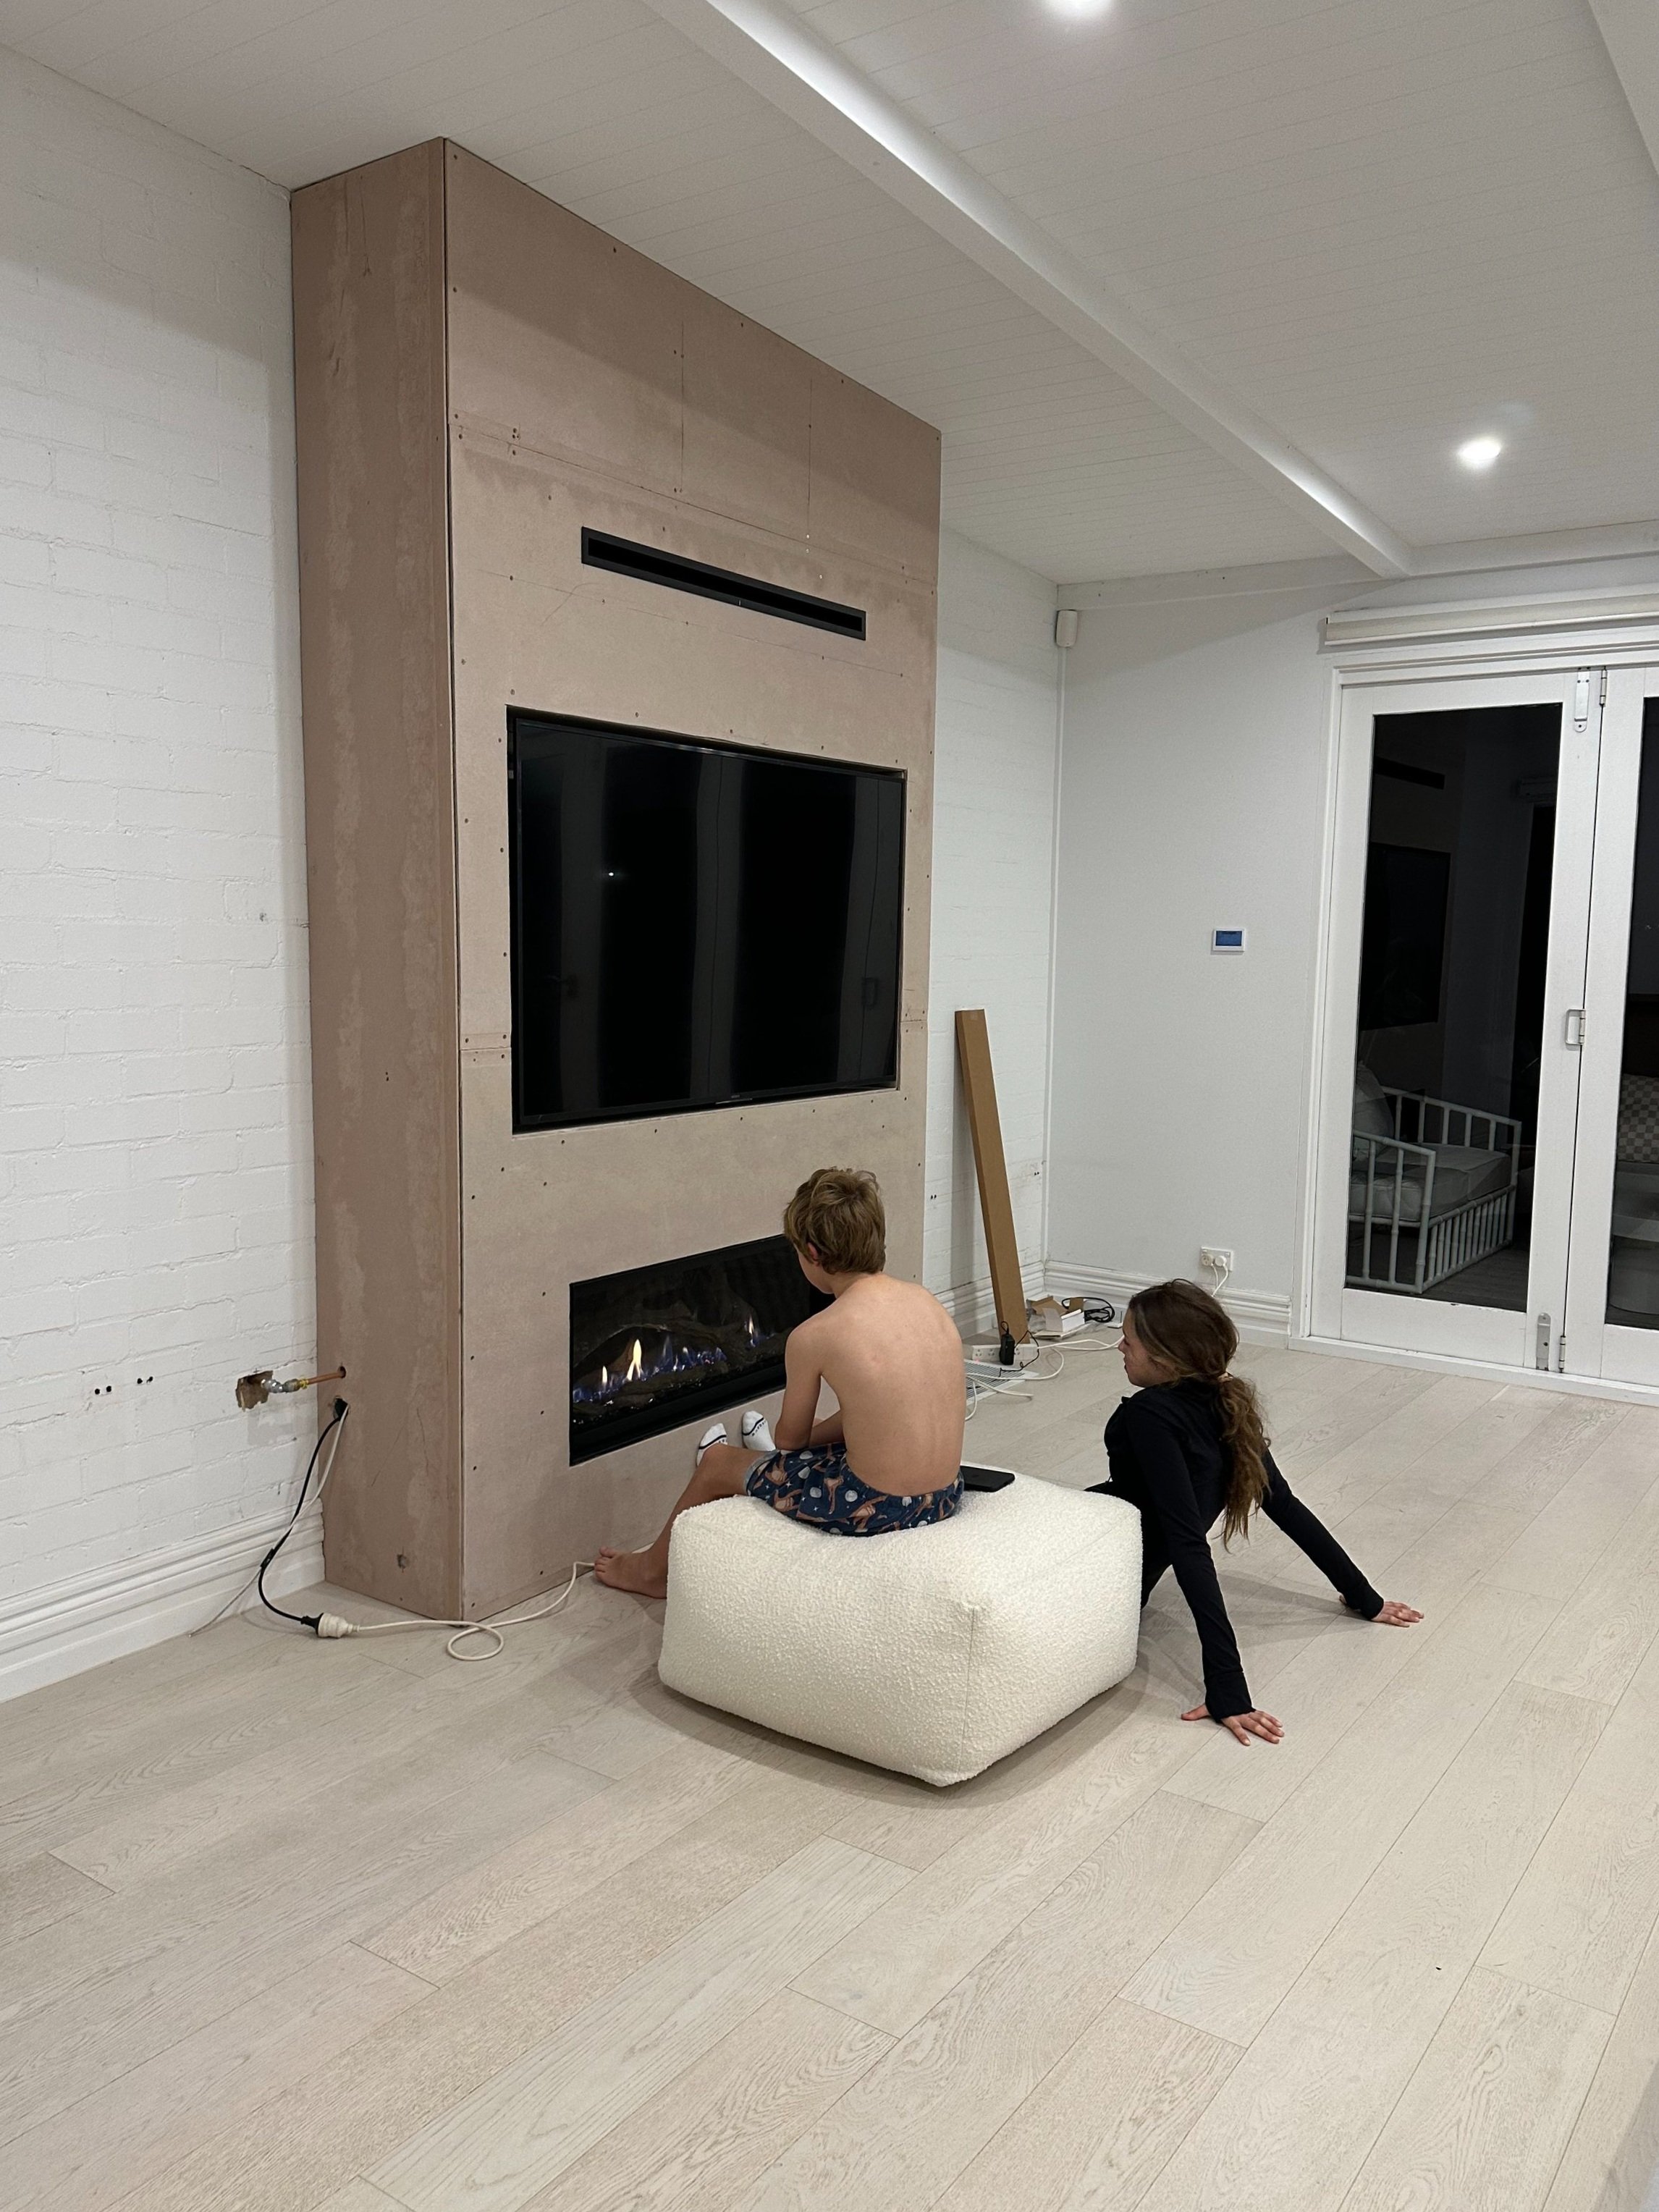
STEP 7: SIT BACK & SOAK IT UP
The hard work’s done, the paint’s dry, the fire’s flickering… now it’s time to enjoy the magic you’ve created.
A fireplace has this beautiful way of turning a living room into a space you’ll actually want to live in - the kind that draws you in, slows you down, and makes you want to stay a little longer. It’s more than just a design feature; it’s a practical addition that, come next winter, will be the heart of your home. And trust us, once you’ve got one, you’ll wonder how you ever lived without it.

HEY, HOT STUFF! ❤️🔥
THINKING OF ADDING A FIREPLACE TO YOUR HOME?
Whether you’re planning from scratch or retrofitting something special, a fireplace is one of those features that can completely change how a space feels, especially in winter.
If there’s a fireplace-shaped hole in your home (and your heart), take this as your sign to start planning. You won’t regret it. 🔥
🔥HOT SAVING TIP 🔥
Don’t buy a Lopi without a Three Birds Dream Discount Card in your hot little hands. You’ll save 15% on a curated range of stunning Lopi fireplaces… plus everything else you need to get your home cosy for winter. Click below to check out the amazing savings.