
THE BEST OF OUR DIY PAINTING HACKS
BY LANA

After nearly a month of bunkering down at home, some silver linings of the COVID-19 crisis are starting to emerge. We’re slowing our pace of life, spending quality time with our families and the DIY jobs we’ve put off for years are finally getting done!
We’ve been sharing some of our favourite, simple paint hacks on our Instagram stories and we’re loving seeing everyone playing along at home. There are some seriously impressive isolation projects going on out there and you all deserve a big (virtual) pat on the back!
Stories don’t last long so just in case you’ve missed them, here are our favourite DIY painting hacks and some of the amazing transformations you’ve shared with us:
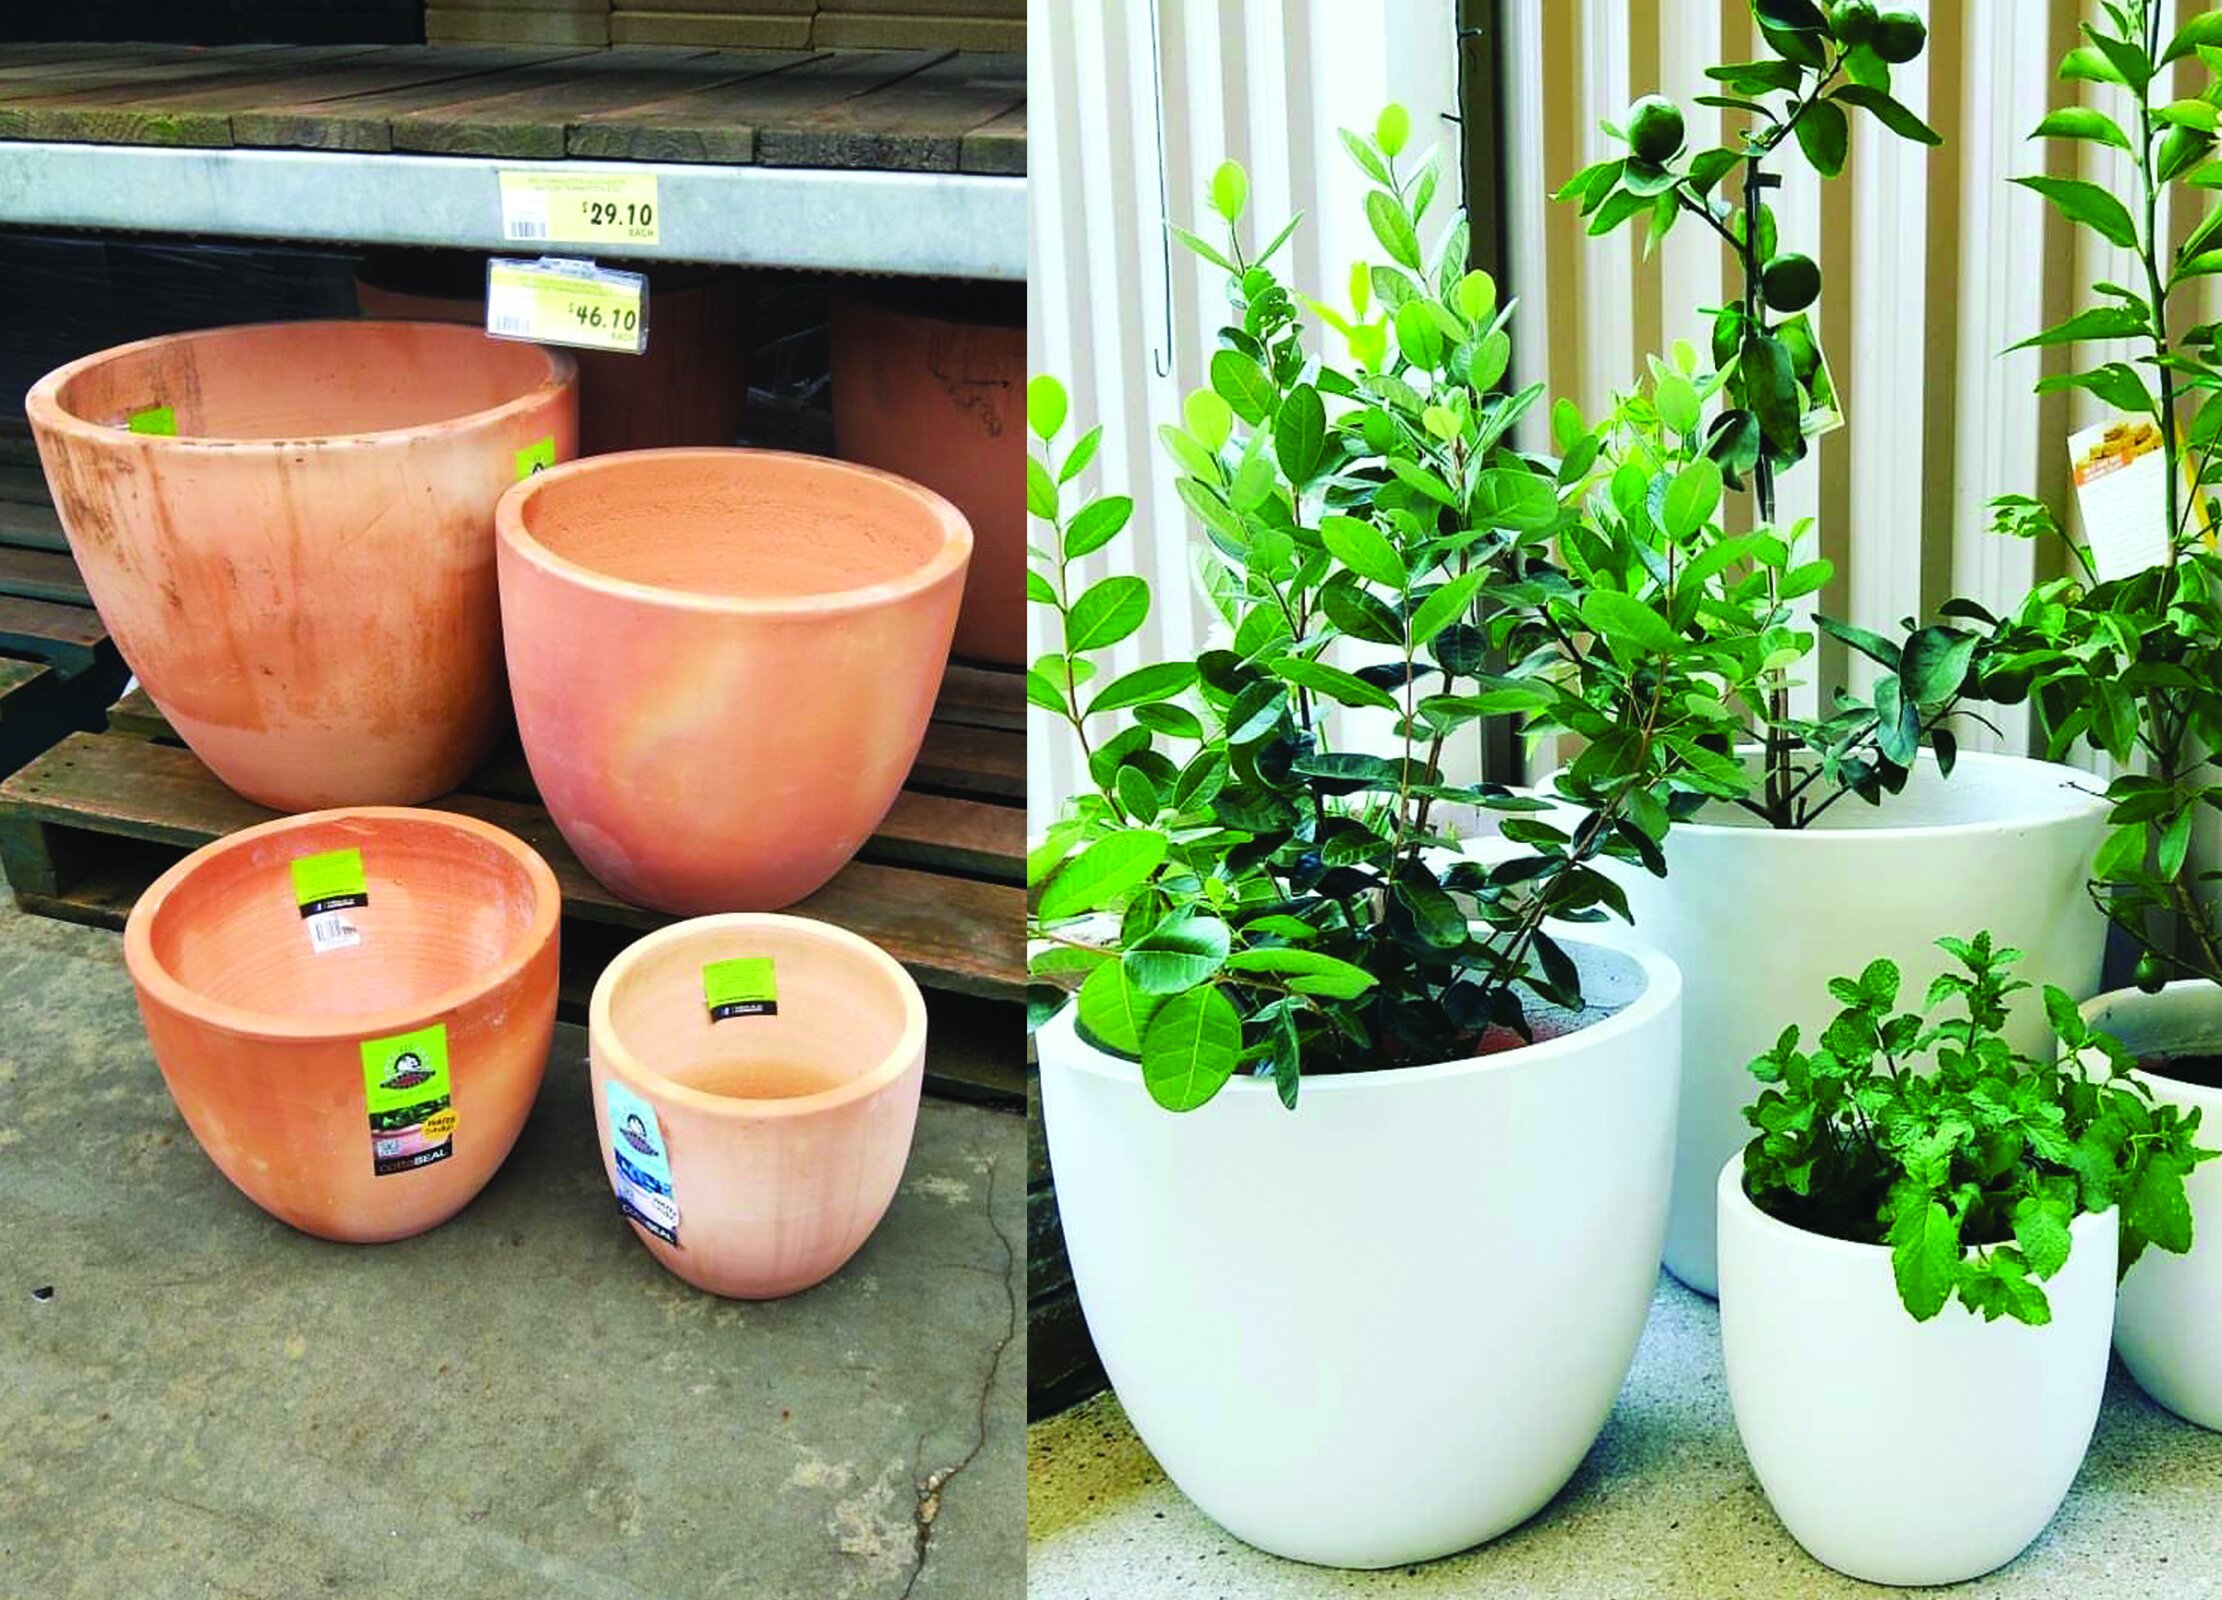
Paint Your Pots
Large white pots are often hard to come by and when you do, they can be exxy! To save some $, you can buy a few well-priced terracotta pots or find any others you’ve got lying round the garden to paint. Here’s how we do it:
1. Pick your pots – you can either use ones you’ve got at home or whatever you can source at the moment. We often find them at Bunnings.
2. Prep your pots – if you’re upcycling old pots, give them a good spray down with the hose to wash off any dirt and debris, you might need a brush if they’re really dirty. Let them dry.
3. Paint your pots - we keep things simple by using the same paint as we’re painting our houses, Dulux Weathershield, but if you’re not mid-reno, just grab a small pot from your local paint shop. The best thing with Weathershield is that you don’t need a separate primer. Brush on two coats, allowing drying time in-between.
4. Place your pots - once your ‘new’ old pots are dry, move them into place #poolside #frontdoor #sideboard before you fill them with soil so they’re not too heavy to carry. Throw in some greenery (or leave them empty) and voila! It’s that simple.


Spray Your Bricks
You guys are going CRAZY for this hack in isolation and we know why… the transformation is not only quick and easy to DIY but looks AMAZING too!
When you’re renovating with Champagne taste on a beer budget, something’s always got to give and spraying old brick work is our favourite reno hack which won’t pinch your pennies. We stumbled across this idea when our budget was tight and we couldn’t afford to render the properties we were flipping. The next best thing was to spray the existing bricks to modernise their look and wow did it make an amazing transformation.
We usually get our painter to spray our bricks as part of his scope of work for the entire house (thanks Peachy!), but you can DIY. Either way, the process is the same. Here’s how it’s done:
1. Clean down bricks with a pressure hose or broom. Make sure the bricks are totally dry before you begin.
2. Tape up any windows and doors that you don’t want to paint. This usually takes the most amount of time but you’ll want to do it right to make sure you don’t get any rogue paint.
3. Set up the spray gun with your tin of paint. You don’t need special paint for this, just a good quality exterior paint - we use Dulux Weathershield.
4. Spray your bricks, moving the gun from left to right to ensure even coverage over the bricks and mortar (Warning: this is really fun – it could cause fights in the family over who gets to hold the spray gun!) Apply two coats.
5. Step back and marvel at the transformation.
We’ve been asked a lot which spray gun we recommend – TBH we just borrowed our painter’s professional gun. Some of our followers have recommended it’s worth hiring a professional gun, rather than buying one of the cheaper models you can get from a hardware store.


Mirror Makeover
Gold arch mirrors usually come with a price tag, so we thought all our Christmases had come at once when we found this sweet little Arch Mirror for only $40 at Kmart. The shape (and price!) was exactly what we needed for our budget bathroom makeover but the colour wasn’t quite right. Hello, spray can!
1. Prep – Mask up! Both yourself and your mirror!
2. Prime – we use Dulux Duramax Metal Primer, it comes in a spray can so it’s easy to use, no brushes required.
3. Paint – for this mirror we used Dulux Duramax Bright Finish Gold. Shake it within an inch of its life and then spray. Try to keep it even and don’t forget the sides! Watch how Bonnie and Lana did it here.
4. Dry – when it’s fully dry, peel the tape and protective covering off.
5. Hang and admire!


Banish Brown Frames
Mission Brown was the ultimate colour choice in any late 70’s, early 80’s reno but in 2020 everyone’s on a mission to banish the Mission from their homes!
In our recent Kitchen Makeover, Lana demonstrated how we transformed the ugly, brown aluminium window frames with the power of paint. So many of you were shocked and wowed that this could actually be done and have been spending isolation trying it out at your own place. Here’s how Lana did it in our Kitchen Makeover:
1. Mask & fill the frames – this is a slow job but it’s worth taking the time to do it properly to protect your glass. Then pop on your own protective gear – always wear a mask at minimum.
2. Prime – we used the Dulux Metal Shield Etch Primer to ensure a long-lasting result. Make sure you follow the instructions and shake for a full 2 minutes before applying.
3. Paint – once the primer is dry, spray with your chosen colour. We use Dulux Duramax spray paint.
4. Once fully dry, remove the tape and protective cloths and prepare to be amazed at your handiwork!


Have you given one of these hacks a whirl at home? We’d love to see your transformations! Tag us on Instagram @threebirdsrenovations